Showing posts with label pattern. Show all posts

Wednesday, 8 July 2015

A parade of handmade spring/summer tops!

This summer I'm not working only on bags and other accessories to improve my shop's offer!
Since it's summer I'm into tops making! :)
I really like to make fresh and comfortable t-shirts and tops using knit fabrics and cotton jersey (I usually buy them at our outdoor market and are very cheap - they are leftovers - but high in quality).

I have three of these handamade spring/summer tops to show you today.

The stripes + flowers top

striped and floral top

A very simple design. It's a self-drafted top, t-shaped, without sewn sleeves, but with a curved hem on the bottom.

curved hem top

The things I like about this top is that it's very fresh and soft and it has some of my favourite peculiarities for clothes: the colours (blue and white!), the stripes, the floral pattern (climbing my left side)! :)


I sent these snapshots to my mum and she said she liked it very much!
The inspiration for this top came from this pin: I realized I could place the floral part of the fabric on one side, to create a lovely asymmetrical look.

The grey petal sleeves t-shirt

Some weeks ago I finished a more complex top: one in grey with petal sleeves and mother-of-pearls bottons.

how to make petal sleeves

how to make petal sleeves

I learned how to modify a basic t-shirt pattern to make a petal sleeve thanks to some tutorials I've pinned in my Pinterest board about "sewing clothes" (this one for example).
I've altered the pattern I've previously used for this cardigan and the work has been simple. 
But I'm not 100% satisfied about the final result, I see too much folds here and there and the t-shirt is not so good on my body shape :(

how to make petal sleeves

However, I'm going to try again, because I'm in love with petal sleeves!

The knotted blouse
There another thing I like when I make/buy tops, t-shirts or blouses: knotted necklines! I'm a bit obsessed.

So this spring (in april) I decided to make a blouse of this kind.
I have only one photo of me wearing it, because now it's too hot (july!!!) to take other images of me with a long sleeved blouse!

how to add a knotted neckline

To make the blouse I've altered this pattern (yes, again!) and self-drafted the neck band.
I think I made a good work!

Since I'm obsessed by knots, I'm going to make other blouses with this caractheristic: I'd like to test the "Mimosa blouse" pattern by SBCC: it's a .pdf pattern for a t-shirt with raglan sleeves (love it!) and a flat knot. I like it because it's sporty and feminine at the same time!
If you like knotted blouses, but you are looking for something more elegant the Lottie blouse (free pattern!) is for you!

Some notes
If you have suggestions about handmade spring/summer tops (or want to share with me the tops you've made), please, leave a comment!
If you're looking for some inspirations, you can take a glance into my Pinterest board about sewing clothes.
Speaking about my future projects... I'd like to go on with asymmetry making something like this or this. But also the Harper blouse (free pattern!) by Spit Up & Stilettos is a good choice for my body shape (I'm a curvy hourglass).

Hope I've inspired you to make some summer tops for you! :)

Wednesday, 12 November 2014

Pattern review: Bonsai bag by MadeByRae

made by rae bosai bag made by me
Do you read Rae's blog?
You should!
It's full of sewing ideas to be inspired by, expecially if you are interested in sewing mum&kids clothes and bags.

In this page Rae shows all her sewing tutorials, included the one to make "Angel tops" I followed to sew my very first one handmade piece of clothing.
Some years ago I've also made a couple of "Buttercup bags", using her pattern, like this or this. 
I still wear this bags, because their medium size is perfect for me and because, well, they have a beautiful design.

My experiences with Rae's tutorials and patterns, as you can read, are great!
They are well written, full of clear images and instructions and easy to follow.
And Bonsai bag pattern is very good, too!

I waited so long to make one! 
I bought her "Bonsai bag" pattern some years ago, after making my buttercups bags, but something didn't coinvinced me (probably I was scared by all that pleats and the sewing around the central panel).
I waited till this october to make one.

But, hey, the final result is this beauty:

ecological and eco-friendly bag

I listed it in my shop. Follow the link to read more informations about the bag (only one note: it's a very eco-friendly bag) and to look at additional photos.

What to say about the pattern?

Let me write down some thoughts about it:
- it's very well written, clear, rich in step-by-step photos (24 pages!!!).
- it's not a paper pattern. You will receive the instructions to download it and then you have to print and cut it at home. I like best this kind of pattern, I think they are more eco-friendly (not shipment involved, not wasted paper, also because I usually don't print all the pages, but only the pages I need) and most of all you receive it very quickly (almost immediatly).
- it offers two possibilities for the closure (and consequently two variations in the pattern): closure by magnetic snap (that I choosed) or by inner zipper
- the pleats and the central panel are not too difficult to make and put together; what you will need is a big amount of pins. And of course ironing the pleats before sewing is a good idea (I did it)!


- the pattern gives you a licence to sell the finished bag (with some restrictions) and this is very good for crafters in bussiness like me.
- in my opinion this bag is not for beginners [*], but a person with some basic skills in sewing and some experiences in bag making can realize it without problems.
- the design is lovely, the final dimensions are just perfect.
- the straps designed by Rae (and shown in the pattern) are different from the straps I made. I decided for very simple straps, but Rae's idea about them is more interesting, because it involves plastic rings and knots (as you can see in her blog).
- the central panel can be decorated by ricrac, trims, pompom thread... Rae shows you how to do this.

Making this bag was a pleasure, so after this very good experience I made a bonsai bag for me, in black, because I hadn't a black bag in my closet:


Of course I know it's not so charming as a bonsai bag with a contrasting central panel, but it's perfect for me and my informal look.

[*] If you want to test one of Rae's bag patterns, but you are a beginner in sewing, you can start with Lickety split bag. I haven't tested it yet, but I can see by the photos that it's not too difficult to make.
But I think my next Rae's pattern to buy is to one to make Showoff bag. I really like the shape!

Hope this post will be usefull for other people looking for good bag making patterns.

Wednesday, 14 May 2014

Yes, another striped t-shirt

I love stripes!
I love them like polka dots.
You've probably noticed it before, because, since I've started sewing clothes for myself, I've made striped t-shirts everytime I had the right fabric for.

And again, I've just finished another striped t-shirt, the second one this year (here the first).
You've seen it (unfinished) in my last post.


It has striped in different colours. Although I'm not 100% happy about the colours scheme of the fabric, there is something I really like in it, probably it's to mix of blues and greens.

The things I like most of this t-shirt are that I had enough fabric to make 3/4 sleeves and that the quality of the knitted jersey is very good (so fresh to wear!).


To make it I've altered the pattern of this cardigan.

I've already worn this t-shirt for a very hard morning of work at school. And it was so confy and fresh!
And 3/4 sleeves are perfect for school in this period of the year, because they are fresh but more elegant than short sleeves.


The only thing that makes me sad about my new striped t-shirt is that I haven't finished it in time for "Spring top sewalong 2014" -___-
Oh, well, it's not so important! :)

Friday, 21 March 2014

Two new rustic bags for spring

Spring has officially started!!! :)
Here in Sicily it's warm and sunny, after some weeks of bad weather I spent sewing new things for the shop.
Today I want to show you two bags I realized with a sturdy cotton fabric with a simple and funny floral pattern, printed on cream background.
They are quite big and roomy, with a rustic style, perfect for spring adventures!

The first bag I made is this one:


Design by Ithinksew.com ("Melody bag"), pattern available on their website, but also on Etsy. 
I tested this pattern, new to me, making this bag and it works very well, like all the patterns of this company I've used before.

The things I like most of this bag are:
- the circular bottom and its pleates:


- the elastic pockets inside (so roomy!!!):


- Some details like the closure (vintage wooden button + cord):


I've uploaded this bag in my shop; it's listed as a bucket bag or a satchel, because it's shape it's particular and it's different from the flat totes I use to sew.

Making this bag required a lot of fabric, but some of it left and I decided to use it to make another shoulder bag:


100% designed and made by me.
It's a simple tote with some pleates on top and a pocket inside (closed by a metallic snap):


It's large and leightweight. You can find it here.
Probably I like best this tote, although Melody bag has a lovely design, too.

Recently I'm also working on some projects which involve the use of very tiny scraps of fabrics. Are you interested?

Saturday, 28 September 2013

The tulip bag - La borsa tulipano

[ITA + ENG post]
 
I made a new bag this week!
I'm still trying to jump out my confort zone (made of small things) and sewing medium/big bags, like I've started to do last august.
Although it's autumn (already!) I'm still thinking about flowers in these days (probably because lovely flowers are still surrounding me) and I tried to design a bag similar to tulip.
 
Ho cucito una nuova borsa questa settimana!
Sto di nuovo cercando di uscire dalla mia confort zone (dove le cose sono molto molto piccole) e di cucire borse medio/grandi, come ho fatto lo scorso agosto.
E nonostante sia autunno (di già!!!) sto pensando tanto ai fiori, in questo periodo (forse perché ne sono circondata, ultimamente), così ho cercato di progettare una borsa ispirata ad un tulipano.
 
So here we have the Tulip Bag / così ecco a voi la Borsa Tulipano:
 
 
It has four pleates on the top and they remind me how tulip's petals arrange themselves. Yes, probably it would be more "tulip" in red or orange, but... it's autumn, I'm enjoying soft colours right now!
 
Ha quattro pieghe in alto, che mi ricordano la disposizione dei petali dei tulipani.
Ok, sarebbe stata molto più "tulipanosa" in rosso o arancio, ma, ehy, è autunno, mi piace lavorare con colori più soft!
 
The part of the bag I like best is probably the wide double pocket inside:
La parte che mi soddisfa di più di questa borsa è forse la doppia tasca interna, molto spaziosa:
 
 
And this is a photo of the paper pattern I drew. It's ready to be used again and again to make other Tulips Bags, because I really like how it came out:
 
E, se siete curiosi del processo creativo come me, ecco una foto del cartamodello che ho disegnato mentre realizzavo la borsa:


Thursday, 4 April 2013

Black+green is for spring/summer, too!

I bought new fabrics last friday!
Knitted fabrics for dressmaking, purchased for only 1€ each piece at my favourite stand in the outdoor market.
I picked up 5 pieces and 2 of them are green+black, a recent love (to me) in colors combos. I used to think these (dark) colors are right for winter, but thanks to these fabrics I changed my mind: if used in "frisky" patterns they can be used in spring/summer, too!
 
 
The first fabric on the left is for a sleeveless top, the second one for a skirt (this is what I planned, but things can go in different directions, of course).
My new clothes will look lovely with my black+green earrings this summer!
 
I've also bought an optical black&white fabric, a very strange choice for me (I use to say that optical patterns aren't for me and that I don't like black&white, but I think this fabric is lovely, don't ask me why!).
I think is good for a top, but it is too short in height, so I decided to pair it with a black fabric to make the "shoulder zone", like in this one or this.
 
Other purchased fabrics are a lycra sheet with a multicolor pattern (mostly light blue and green) I can't properly describe and a floral lightweight one in royal blue (love it) and pink!
 
 
No projects for these. Probably mum will like them (expecially the firts one) and I'll give her them as a gift (she will be here to visit me with dad at the end of april).
 
A little note about these fabrics and their price: they are leftovers from dressmaking factories, mostly the ends of big reels, ready to go into trash cans. A man collects and sells them with the factories' permission, of course!
Ecofriendly, don't you think?
Prices are between 1 and 3 € for each piece (it depends on their dimensions), a very fair price! :)
The funny thing is that I often find clothes made of these fabrics in the shops!
Last year I found (in a Conbipel shop) a dress with the same floral fabric of my first top, I saw a woman wearing a (not handmade) t-shirt made of the fabric of my striped top (but in cream and green) and last friday I saw on the stand the same striped+floral fabric you can see in this Promod dress.
So funny! :)
 
I'm ready for some spring/summer sewing! :)
I've already started to make a t-shirt in blue (fabric bought last year) and I planned to work on tops, because it's time for "Spring top sew-a-long" again and I really want to join!
Are you with me?


Friday, 22 March 2013

Pastel bags in recycled damask

Yesterday I published two photos of two new bags I made, writing a little note about the new "country inspired" background I'm exprimenting with.
I photographed them near to an old cement wall: it is in the back of our little house (ehm, ruin!) in the country.
Some photos on some trunks under the big mulberry tree, too.
Love these new backgrounds and the clean light! :)
 
And what about the bags?
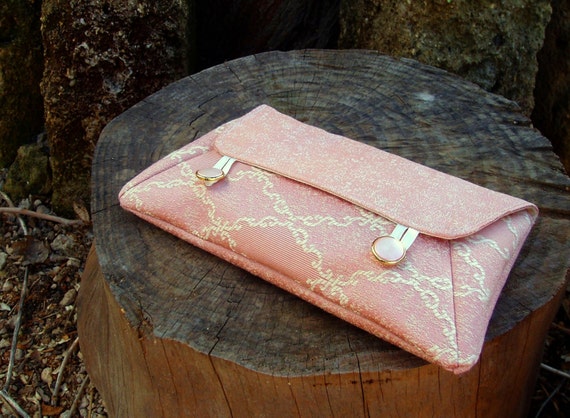
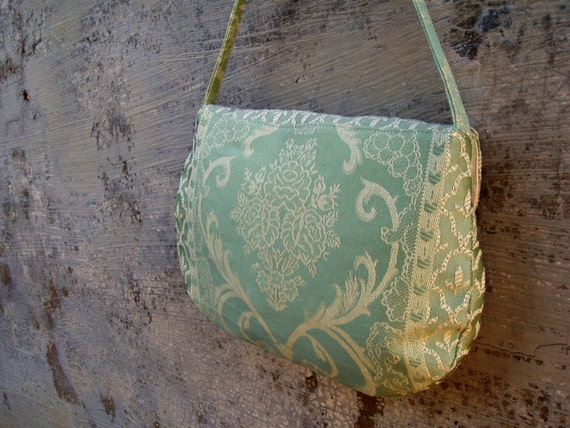
They are made of recycled damask, received by my friend-upholsterer, Vincenzo. He gave me some sheets from old pattern books, in perfect conditions, as usual. They are very small, so I decided to sew little bags... pastel colors, classic patterns... perfect for spring events, like weddings, etc.
 
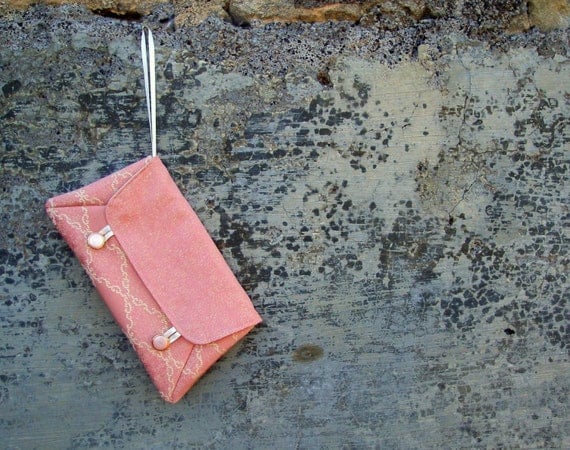
The first one  (an envelope clutch) is pink:
 
 
The pattern is by Ithinksew.com (Alanis clutch), but I've altered it a bit, adding vintage plastic buttons and ribbon.
It's a simple pattern, but the first time I tested it (last June) I made a disaster: this clutch needs interfacing, of course, and I choosed rigid fusibile interfacing, because my idea was to make a rigid clutch.
Big error!
It was almost impossible to turn inside-out, after finishing it, and I ripped some seams.
Lesson learned: for this bag I used my faithful plastic net and all went right!
So, if you want to make this clutch, remember to choose the proper interfacing!
 
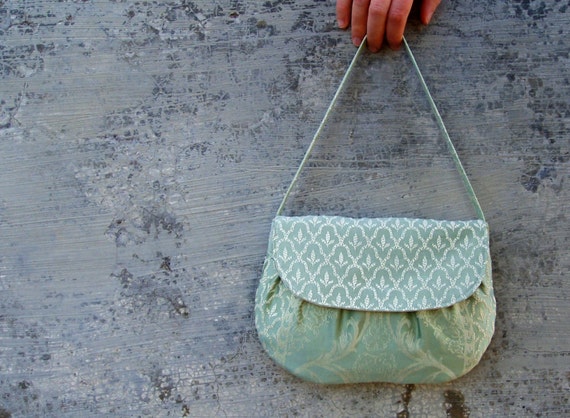
The second bag is green, in a lovely tone between sage green and jade:
 
 
For this bag I worked again on Josy clutch pattern by Ithinksew, one of my favourite patterns of this brand (probably you'll remember I used it a lot in the past).
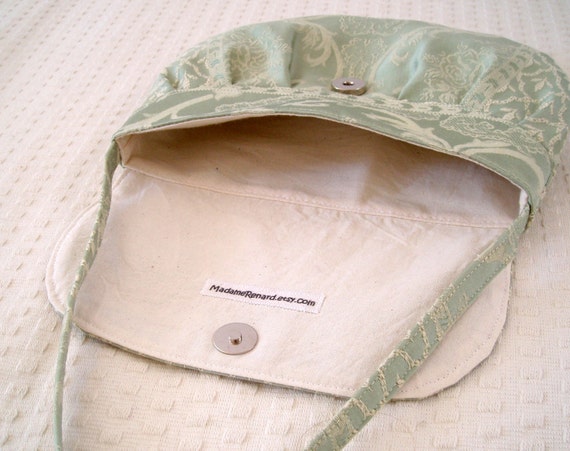
I love the back of the bag: it has a pattern of roses:
 
 
Both the bags have a lining in a natural cotton+linen fabric in cream: it makes a nice contrast with the shiny and soft damask and gives a touch of "rustic".
 

Tuesday, 12 March 2013

I finished my "Tree of joy"! :)

I received this lovely embroidery pattern last october; I won it thanks to Carina's giveaway!

I've immediatly started to work on it in the following days, but I've abandoned the project because the fabric (a very lightweight organic linen) revealed soon to be the wrong choice.

But then I found the perfect cloth in the box of fabrics Francesca sent me in december: a not-too-thick and not-too-thin cotton in light violet.
Love it!
So I re-started the tree of joy project! :)

I worked on it before sleeping, in bed. Five minutes every time... after a pair of weeks I finished it!
 
About the colors... I know they are very different from Carina's suggestions written in the pattern. But it's not a problem, you can use the colors you like best!
 
Now it's time to move to the second phase of the project: to emplioy this small embroidered sheet into "something".
I think I'm using it as the central panel of a patchwork pillow, but I'm open to other suggestions. If you have one, leave a comment, thank you! :)

Wednesday, 27 February 2013

Recycled felt for Easter bunnies

I accindentally felted a pure wool sweater in the washing machine last november >____<
I'm not a perfect housewife!
My cozy and warm sweater became small, but it kept (and even increased) its softness. I've immediatly understood that this little accident gave me a new and beautiful material to work with. 
Recycling opportunity, yay! :)
 
So I saved the sweater for futire projects and last sunday I cut it to make...
 
... Easter bunnies!
 
 
Aren't their back-sides super sweet?
Ok, I'm showing their faces, too! :)
 
 
They are simple and stylized bunnies, with long ears, a crocheted heart (made by AuntFran) and embroidered face.
 
 
I love how pink and turquoise give life to beige felt and also how these colors make a nice mix with brown!
 
I think they are a funny couple! :)
 
While making them, I changed a bit the original design: I added a tail and replaced the belly with the crocheted hearts.
 
 
Turquoise rabbit's tail is a tiny pom pom!
 
I made them using the pattern I designed some years ago and you can make them, too, because they are a super simple project.
Save the pattern here!
 
If you like them, but have no time or sewing skills to make them... you can buy the bunnies in my shop.
I listed them in two different pages: pink rabbit and turquoise!

Thursday, 7 February 2013

Doing my drawing homeworks: hedgehogs and paisley motif

Sometimes S. and I watch tv shows or movies after dinner. If I'm not too tired and have some energies to spend in something creative, I open my moleskine journal and start to draw.
I watch tv through rapid glances and by listening the sound, eh eh.
You probably know that women can do two (and more) things at the same time.
 
Recently, instead of drawing usual things (for me: pastage stamps, flowers, imaginary landascapes, birds and snails), I started to work around themes I like.
Subjects that fascinate me but I have difficults with. A bit challenging but relaxing. It seems like I'm doing drawing homeworks :)
"Draw a house ten times", the teacher in me says. And I do it!
 
Last week I spent almost an hour drawing hedgehogs:
 
 
These little creatures are so lovely!
They are very common in Europe; when I was a child dad captured one in our garden (and he gave it freedom after showing us).
I titled this drawing "Il prato dei porcospini" (hedgehogs' lawn).
 
Yesterday, while watching "Letters to Juliet", I challenged myself with paisley motif:
 
I have a fatal attraction for paisley. Don't ask me why.
My idea is to draw by myself an embroidery pattern to use on new accessories, but I'm not satisfied by my drawings.
I numbered them and my favourite are number 4 and 6, but I'm not sure if they have the right look to be embroidered. They have probably too much details and haven't the indian/oriental look that it is supposed to be "a must" in this kind of motivs.
Uhm, what do you think?
Suggestions are welcome.

In the photo you can see my favourite drawing pen at the moment.
Green+black, a recent love! :)

Tuesday, 2 October 2012

My dog is a dandy

My dog is so dandy that he always wears bow-ties in odd colors :)
Like canary yellow!

 
Isn't he lovely?
He's the new entry in the family of handmade softies I have at home (in the bedroom where mum&dad sleep when the come to visit us).
His new friends are Erasmo the crocodile, Mr Buh, and two giraffes.
A little and cute zoo!
 
His name is Oscar, a "tribute" to the most famous dandy man of the world (yes, Oscar Wilde). I like this name, because it's short and simple (perfect for a pet) and it is a common name in Italy (so used that it sounds to me like an italian name althought it's foreign).
 
I made it last sunday following this tutorial (with free pattern, too!).
I don't know if I made some mistakes printing the pattern or not, but the sure thing is that I obtained a tiny tiny creature.
And it's not so simple to sew.
So, please, if you want to sew a dog for you, take a minute to consider the measurements of your pattern pieces, especially if you are a beginner in sewing.
However the pattern works well. It's perfectly drawn. No complaints.
I love it! :)
I want to enlarge it a bit to make a bigger dog someday!
 
Oscar is almost 100% made of recycled materials!
The dark brown fabric is a part of my boyfriend's trousers, the turquoise (with cute polka dots in white) belly is made of a tiny fabric sampler, the bow-tie is a ribbon I saved from a gift wrap, the other parts are made of small leftovers of other sewing projects.
 
Well, Oscar is a niece dog :)
I likes to keep me company while I'm studying.
 
 
It has odd and funny ears that stand up. When my boyfrined saw it, he said: "Ok, it's a dog, but it seems to me a rabbit with donkey ears!".
Oh my god!
He made me laugh forever! :)))
 
 
Say hallo to Oscar!
 

Sunday, 15 July 2012

Corners!

"Corners" is the new (so interesting!) theme for June-July challenge here on Etsy Italia Team Land!

I hesitated a bit before making something for this challenge, because geometry and straight lines usually haven't nothing in common with my shop.
But... I finally found a beautiful fabric by Laura Ashley in my stash (a Xmas gift from Cristina) and, well, it was simply perfect!
It has corners everywhere! Lucky me!

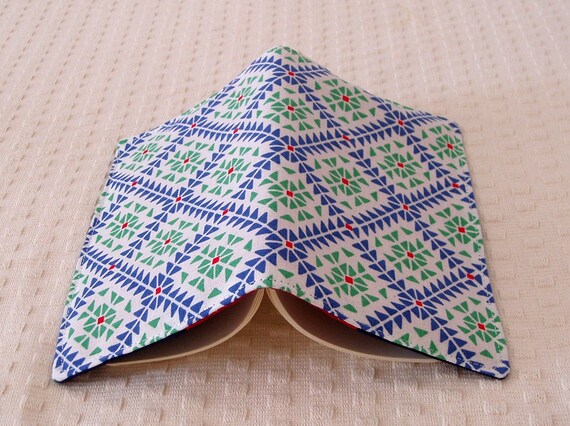
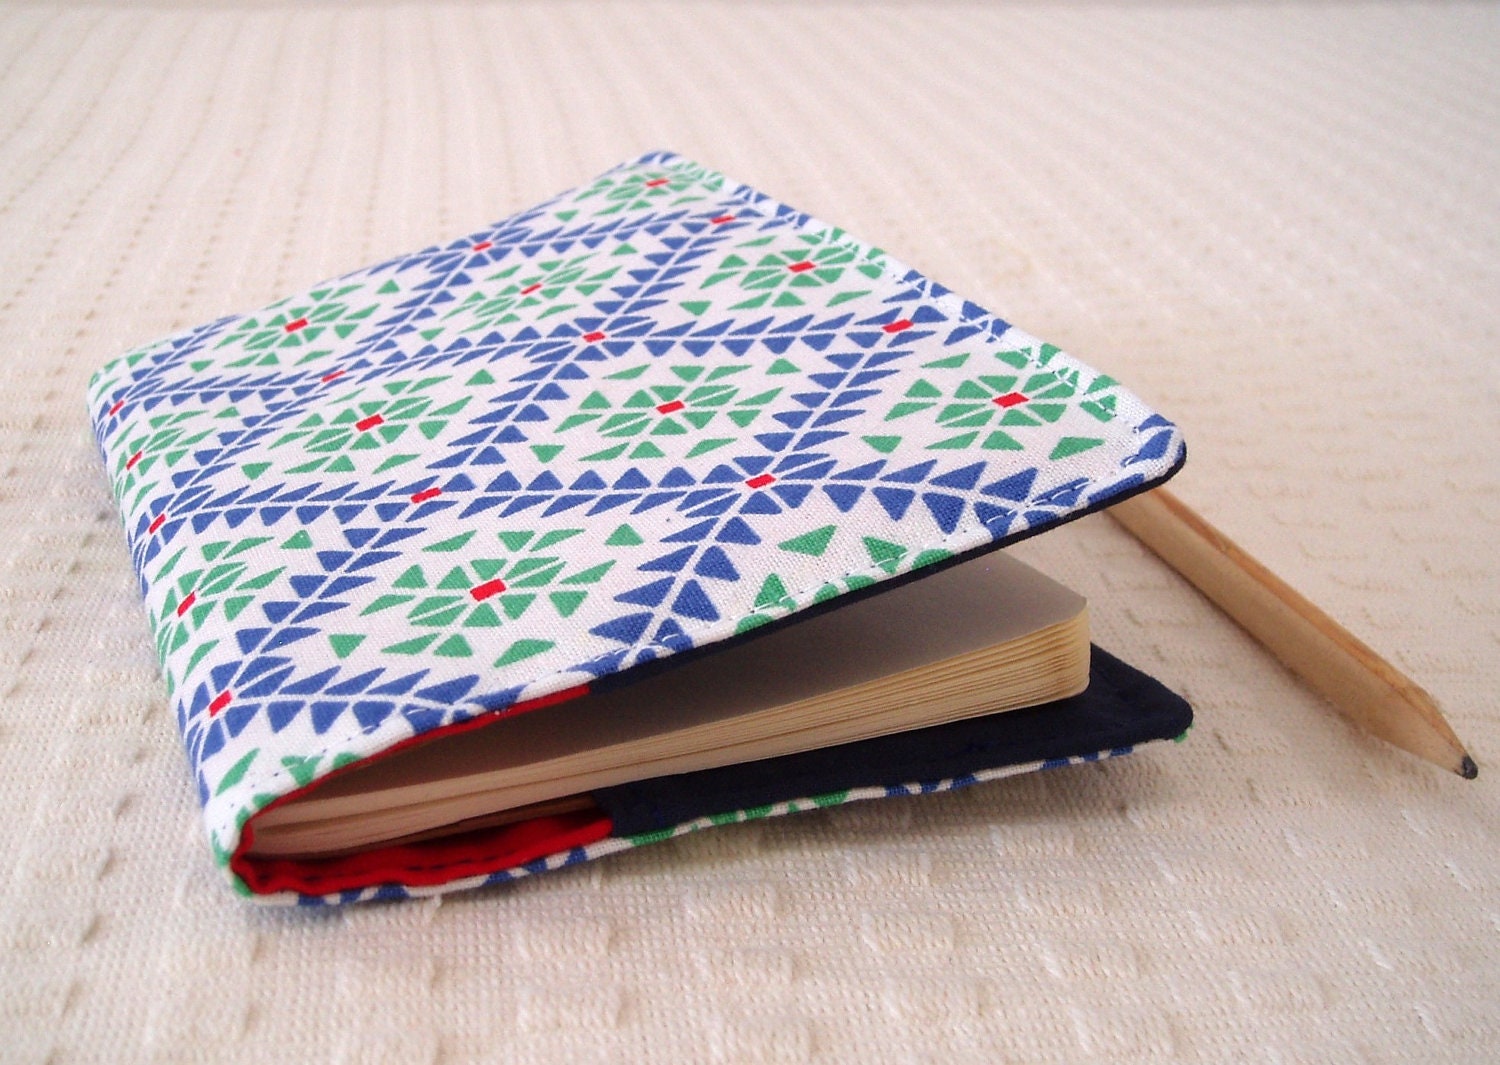
I made this fabric cover for Moleskine cahiers:


Isn't the fabric lovely?
Modern and colorful, without being impudent :P
And navy blue + green is one of my favourite combo!
I used it in the past for a bag I'm using a lot this summer, this one (pattern by Ithinksew, Nevena bag).

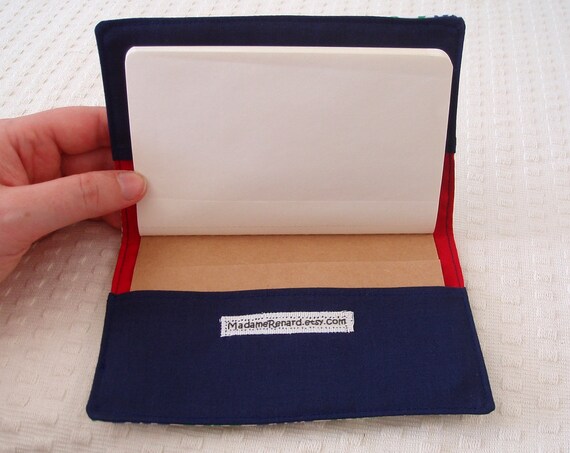
I added blue and red cotton fabrics for the inside:


You can see other lovely handmade creations around this theme in this blog post. And I hope you'll spend a few seconds to vote your favourite! (I gave my vote to Marzia's earrings.... shhht, it's a secret!!!)

While making this cover I used google to find informations about Laura Ashley; I hadn't no idea if it was the name of a real woman or only a brand (it is probably famous in other parts of the world, but not in Italy).
Well, I found a world full of amazing home decor ideas and DIY suggestions... look at the shop on line and the blog (expecially the Make&Do section) 
Candies for my eyes *___*
All is so feminine and fresh! Love love love!

Thursday, 5 July 2012

Olivia women shoes are ready!


As promised, I'm showing you the first pair of slippers I made following the "Olivia Women shoes" pattern by Ithinksew.
Not bad!
I made them in 38 european size, cm 24 from heel to toe, but of course the pattern is for all women sizes.


They are already in my shop, if you are interested.

About the pattern... it is great, well written and full of clear photos, like the other patterns by Ithinksew I have tested in the past, Kimono and Radella women shoes.
But this one is a bit more difficult to follow, I think it not a pattern for beginners.

After all those pins... the soles!


And the heels!


Opinions in the comments are very welcome!
Bye bye, have a good day!
Related Posts Plugin for WordPress, Blogger...