Showing posts with label tools. Show all posts

Friday, 12 February 2016

Blog makeover! Oh, yes!

After my complaint I decided for a blog makeover!

Yes, I love tooooo much to have a special little space to write in, to share my adventures in self-expression, to tell the world something about my steps into the sewing world and my inclinations for nature, country life and creativity in general. 
I didn't like the idea to give up.

So I've rolled up my sleeves and started a very big work. 
A lot of things to change, a lot of aspects to consider and to re-think.


blog makeover ideas


This is what I've done
  • I've made a new banner by myself!
    I was still in love with the one Francesca made for me almost 5 years ago, but it wasn't representing me after some important steps done in my creative journey. 
    I'm not very skilled with graphic design, but I realized something I like with very simple tools: Picmonkey collage tool and Microsoft Word.
    Oh, yes. 
    The banner includes written words about the key subjects of this blog (eco-friendly sewing, rural life and creativity) and a selection of photos from my little word. 
    It speaks about me because it's simple.
  • I've re-organized the right column, also adding some useful things like a contact form and social media buttons (you can find them at HopefulHoney blog).
  • The pages are new! New contents and photos, but (so important) I've added a page about tutorials and free stuff.
  • New palette! I decided for the couple light avio blue + light cyclamen.
    Do you like it? It speakes about my personality (I'm quiet, not noisy) and my love for all is nature inspired (I was thinking about flowers and water, when I picked up them).
  • New fonts! not only Verdana, but also Copse in different "sizes" for all the titles. And la Belle Aurore in the banner, because I've used it for my shop and it works well.
  • I've learned how to center dates and titles in all posts and I love the result!
  • I've added some suggestions for further readings at the bottom of every single post thanks to Linkwithin.

How I did?
You probably know I'm not very skilled in web design and other geeky things.
But I love when I can learn new things to make by myself.
So I've read a lot (a lot!) of tutorials on line and followed them.
Simple :)

Simple doesn't mean easy.
I've had some difficulties here and there, but I succeded after some attemps.
Now I'd like to know how to add some buttons at the end of the posts (you know... for sharing the content on google+, facebook or other social medias). I can do it!


And now?
I'm going to work on content.
I have to clear my mind about what to share here in my blog.
I can't simply think to speak about me and my creative journey when I have something interesting (in my opinion) to say.
It doesn't work.
I'd like this blog will be useful to other people.


What do you think? Your opinion is very welcome!
Please, let me know if you like the new look of the blog! Your opinion is very important to me!
You can write a comment also to leave a critique (negative, too, it's not a problem) or suggestions and new ideas!
Your comments are fuel for this blog!

Thursday, 30 July 2015

Simple happy things - July 2015

Last year I worked on a little project and documented every single day of July (I've called it "July in 31 photos").
Not the same, this year. 
July is very hot, I feel like I'm very down on batteries and I am not doing special things to capture with my camera (although I think that there's something special for us everyday and that happyness is hidden into simple things). 

But of course I took some snapshots here and there.
They make a sort of visual diary of this month. Simple things in my life.

Critters around the house...


A super secret project I can't wait to share with you...


Some hard and satisfying work at the sewing machine...


(completed this month: 5 bags + 2 wallets + 1 moleskine cover)
(bags 1 e 2 uploaded in my esty shop)

Summer yumminess...


Important birthdays and lovely birthday gifts by the kids...


Testing new tools (rivets!)...


Friday, 14 March 2014

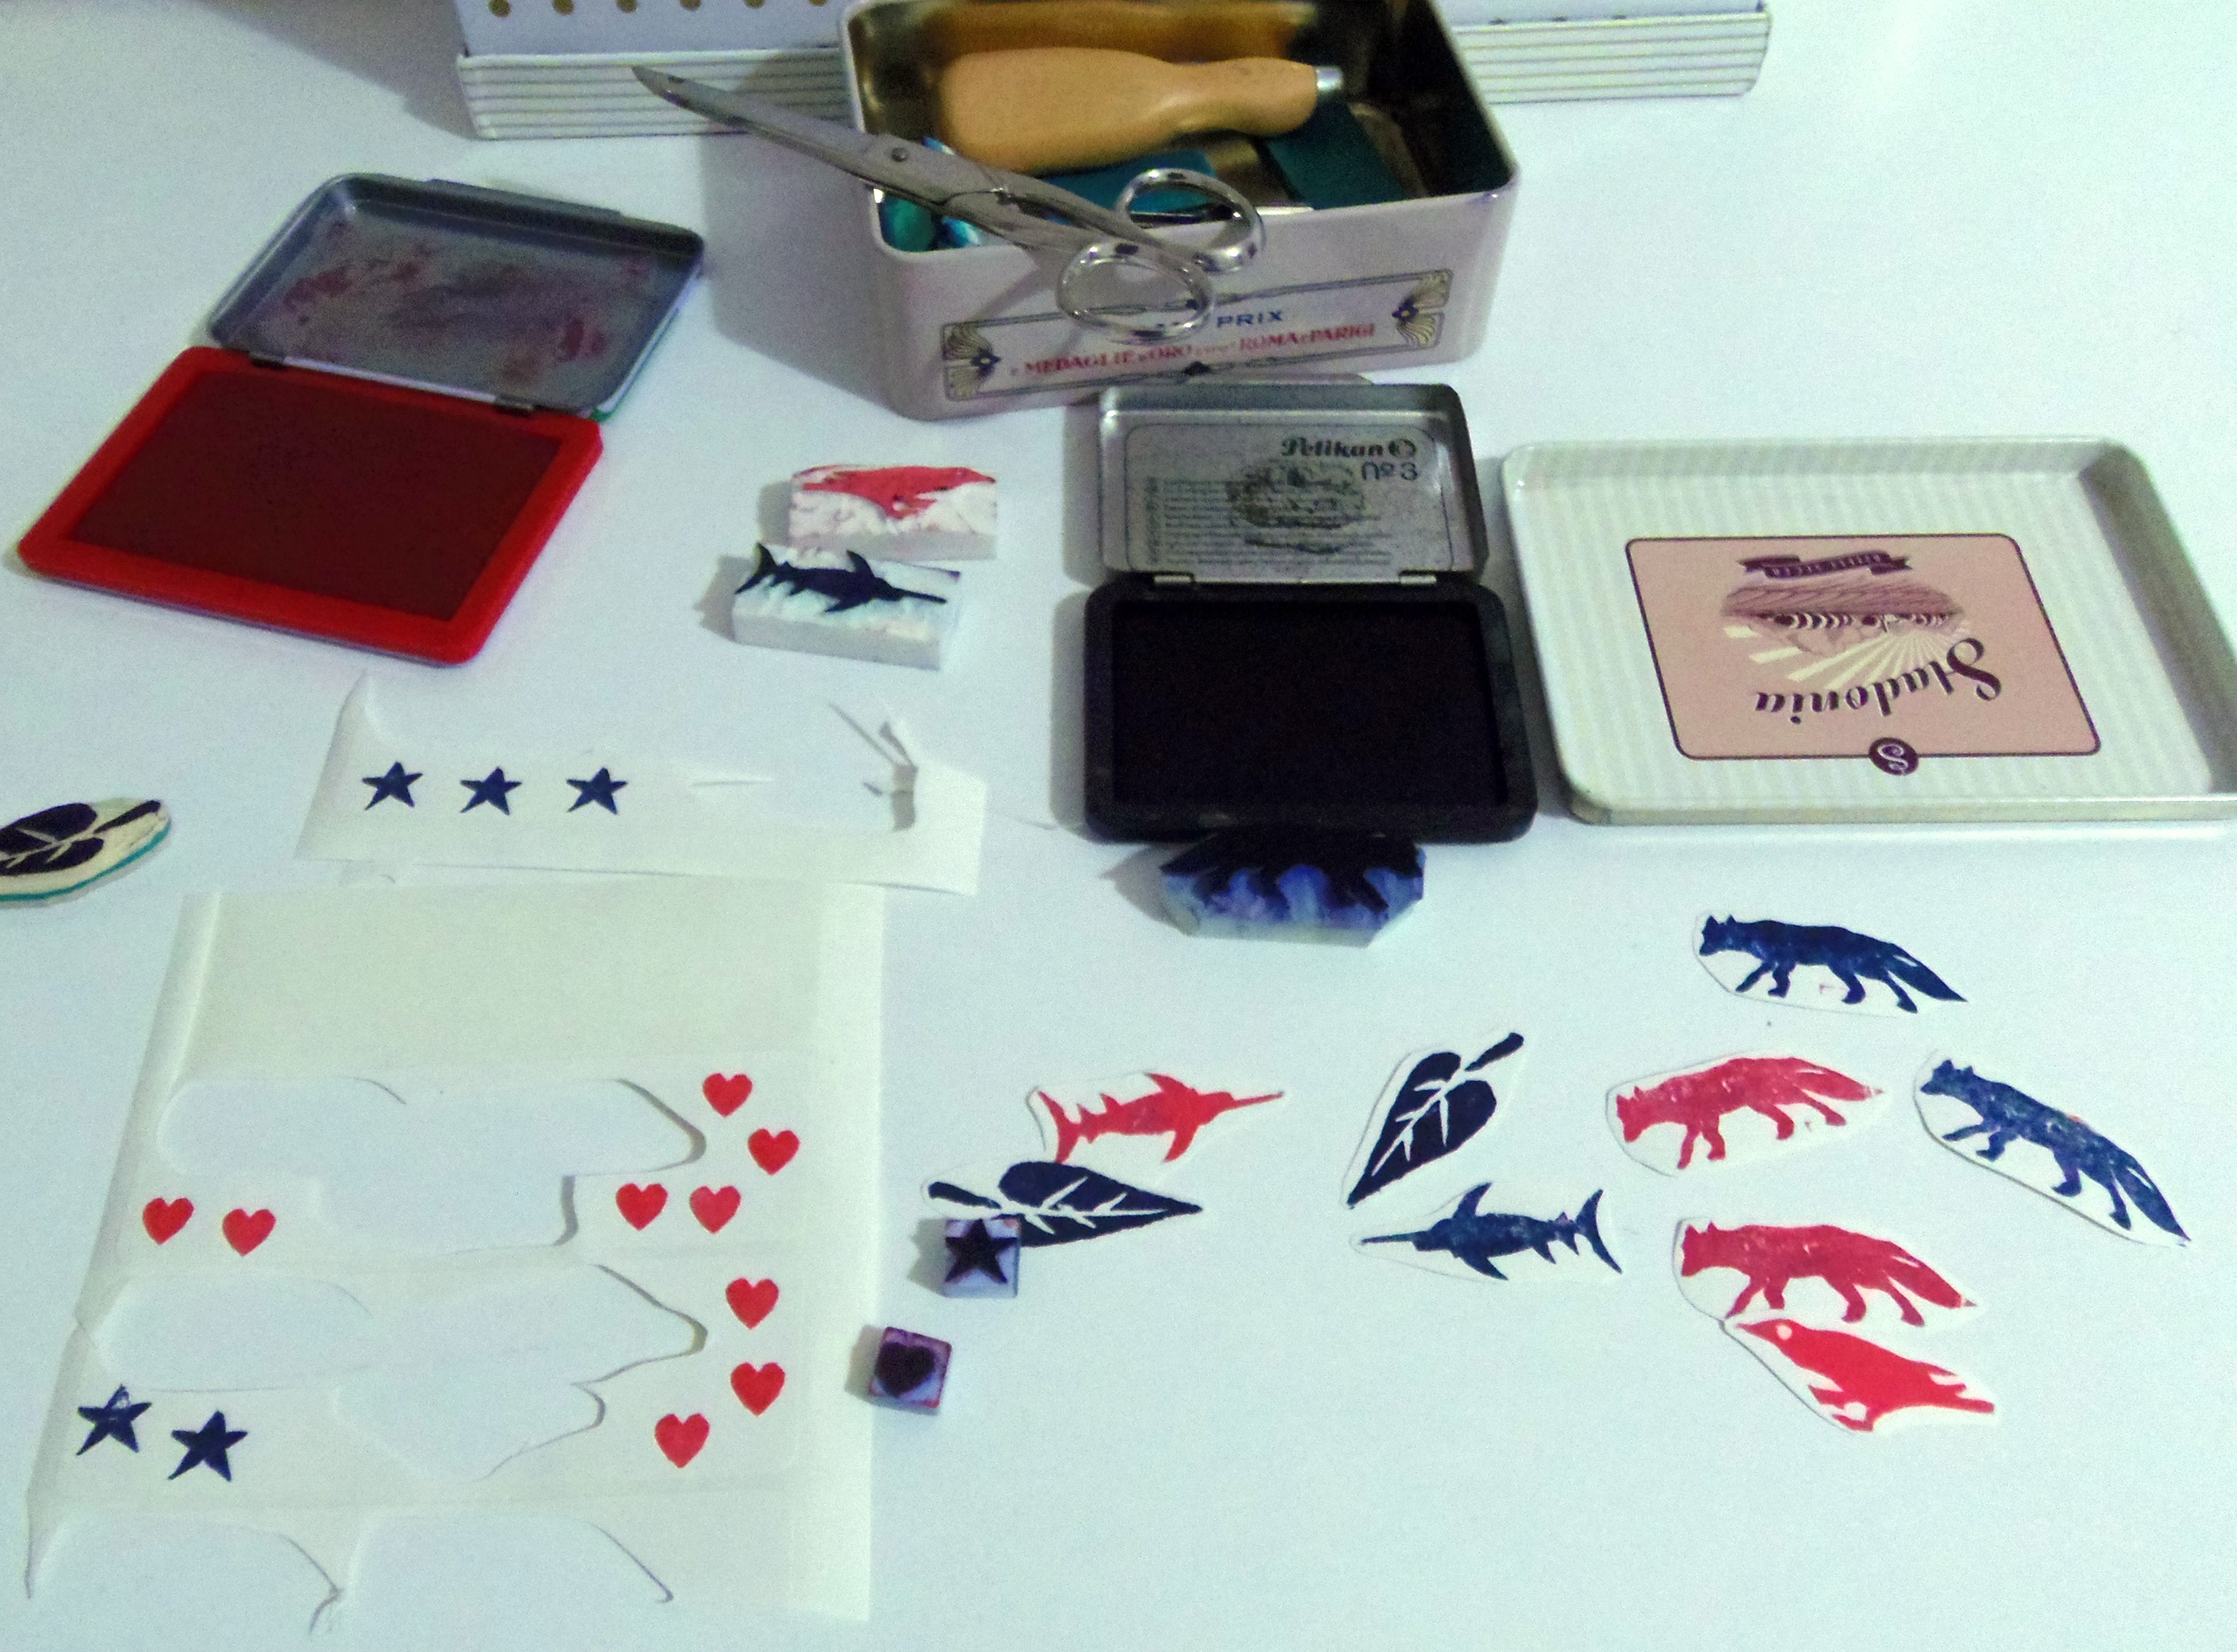
Using my stamps: handmade stickers

I'm in love with carving stamps with my hands.
I love the idea of making little tools which allow you to repeat your "works of art" without limits. 
But, to be honest, I rarely use my stamps in very creative ways. I used to decorate pages and envelopes with them and anything else.
This happened till last wednesday, when a simple but funny idea knocked to my brain: stickers made with my stamps! 
Uh, sounds good!
I picked up some ready adhesive labels (not sure about their name in english) and started to decorate them with my stamps.


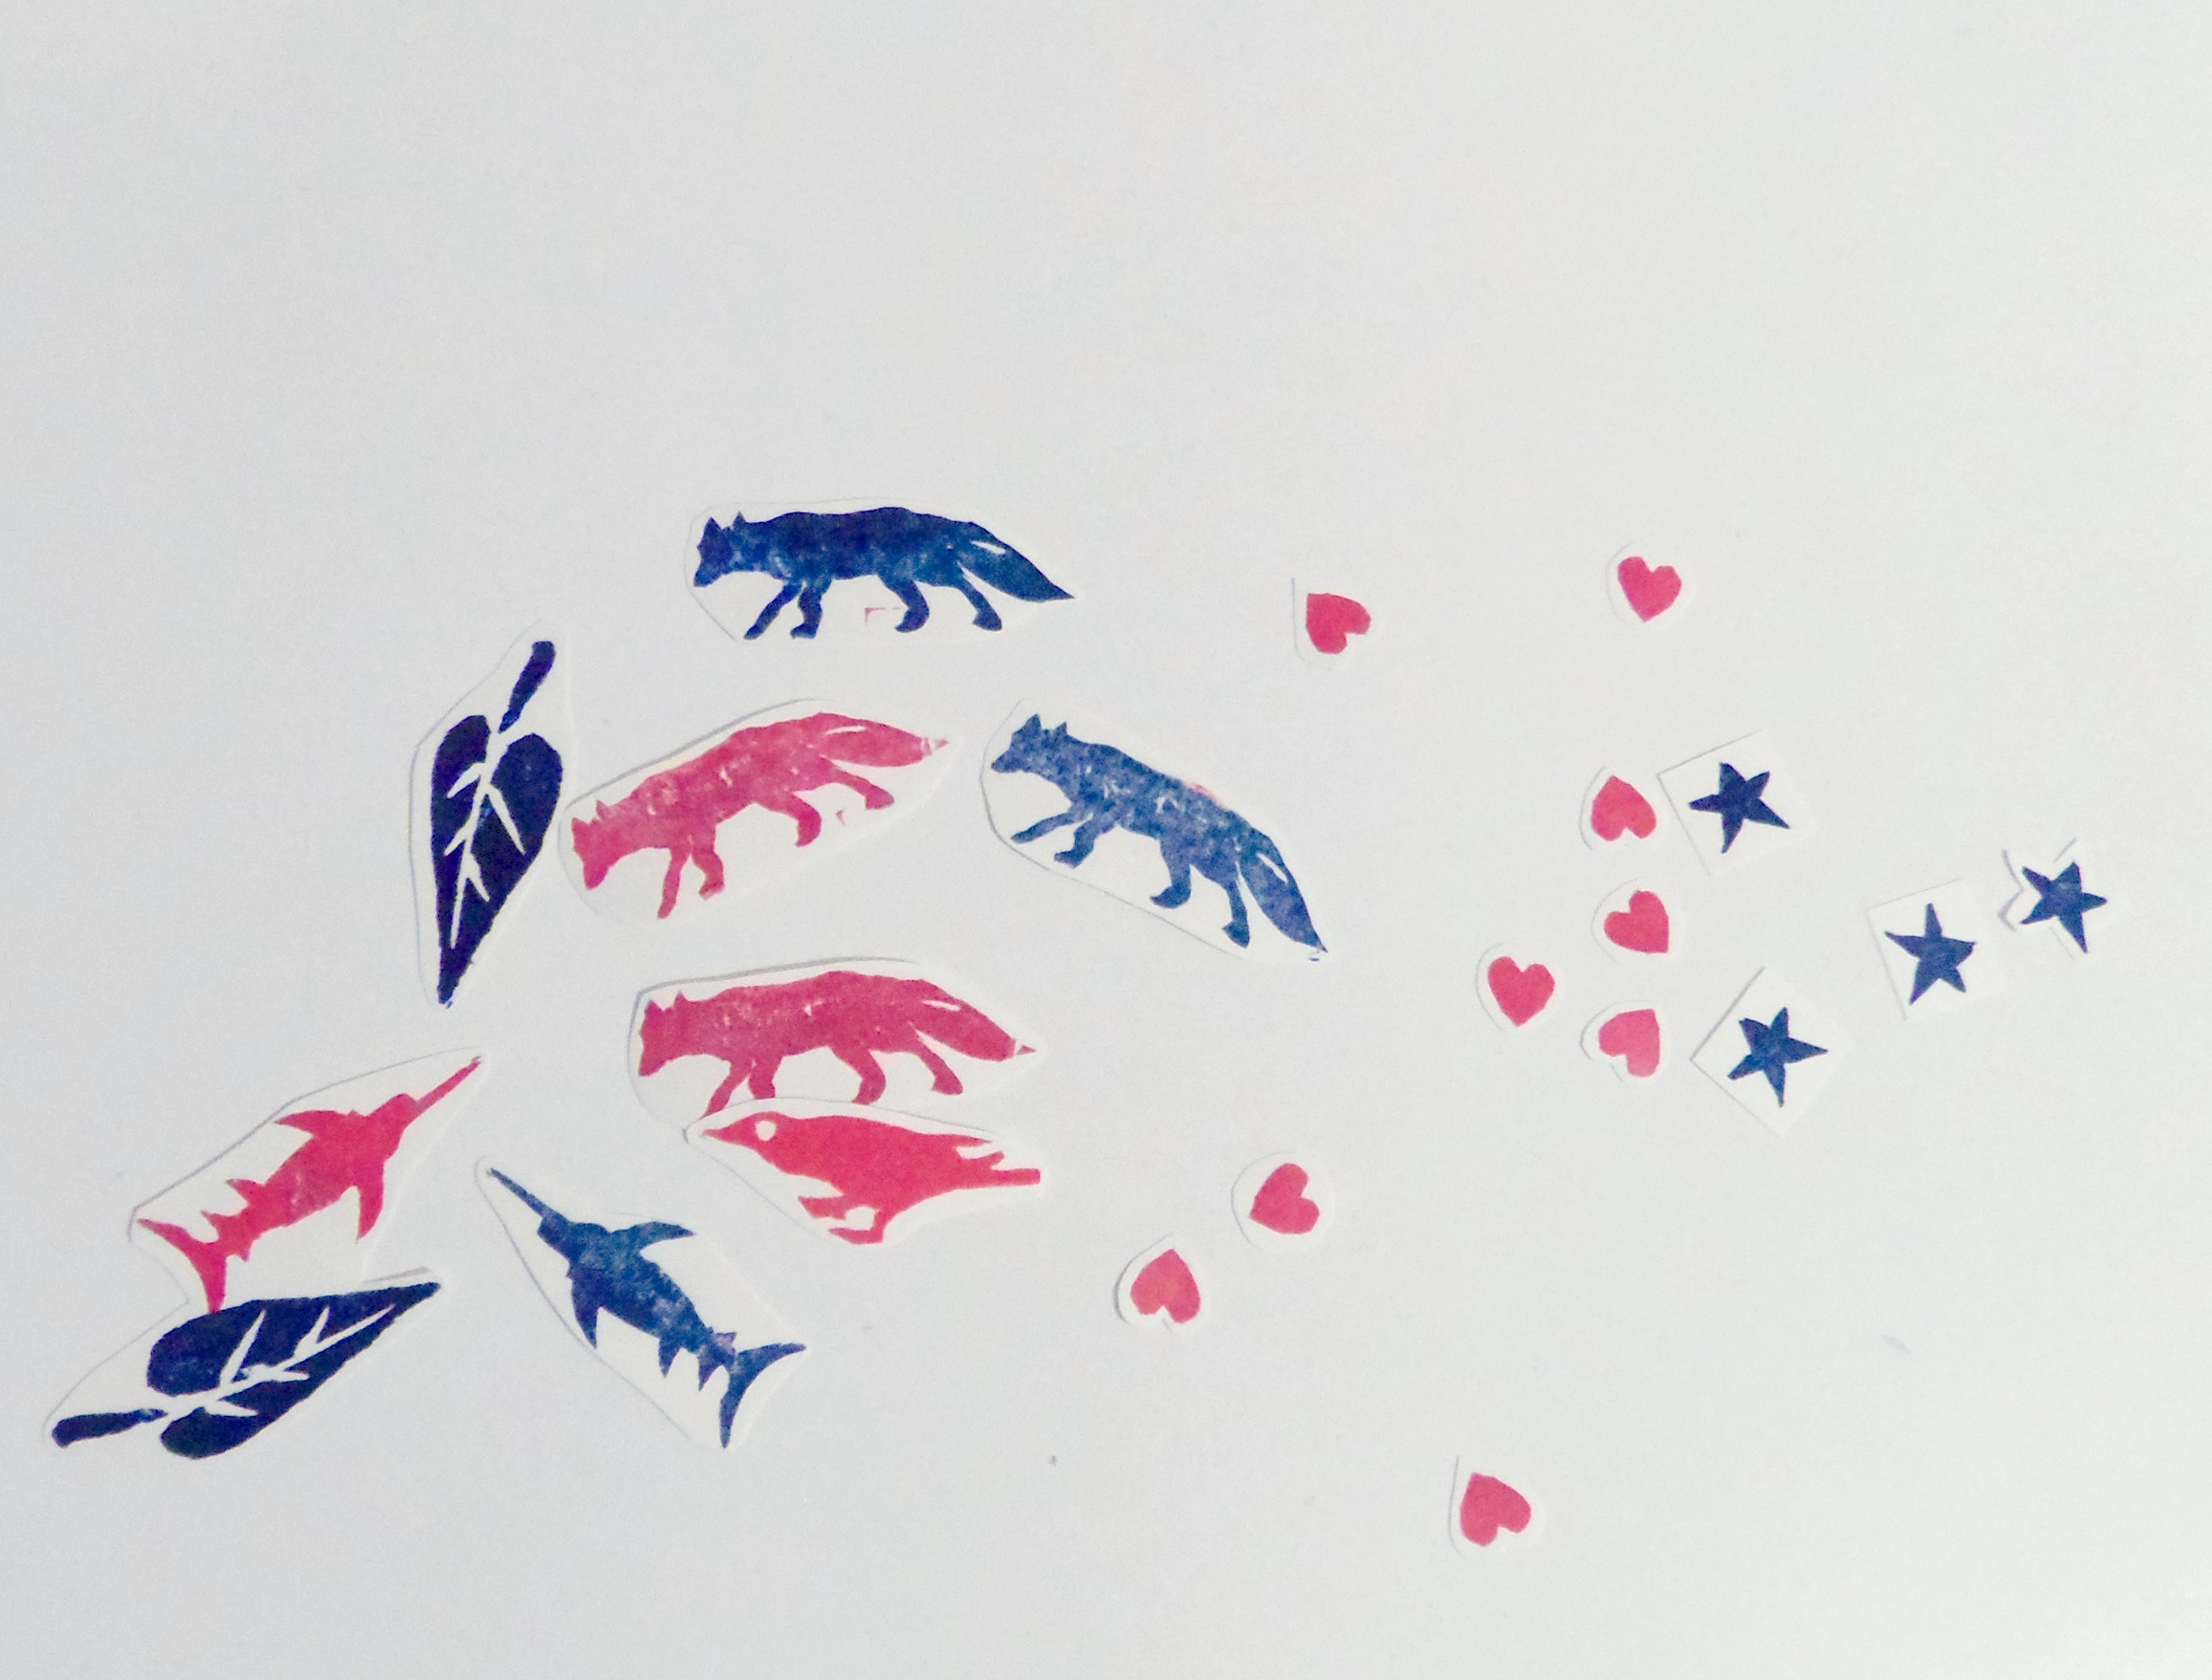
Then I cut around them with my scissors and ... ta-daaah!!! I got cute and unique stickers! :)


A very easy and quick project to fill some minutes with!
I want to use my stickers to close envelopes and decorate cards. 
I made some foxes, swordfishes, leaves, birds, stars and red hearts. But I also have other animals (+ a dino!) to play with in the future.

As usual I tested the final product on my moleskine journal, adding also the date with the date stamp S. gave me last october:


This experiment gave me some happy moments and now I'm looking for other creative ways to use hand-carved stamps.
If you have some suggestions, please, leave a comment!

[Sorry for the bad quality of the photos in this post. Artificial light doesn't help!]

Sunday, 10 November 2013

A super secret project (granny squares included!)

Today I'm sharing a secret with you :)
I've (hand)made Christmas gifts for mum and AuntFran and they are super secret, so, please, don't tell anyone :P
Mum and AuntFran don't read the blog (because they can't read english), so I can show them with you, but, hey, be discreet, please!
 
Going on looking for unconventional uses for granny squares (after my mp3 reader's case), I decided to make for mum and auntie two sewing+crocheting pincushions.
 
 
Although they sew and do other crafty things pins are involved to, they haven't a pincushion, don't ask me why.
 
I used the very first two granny squares I've made this summer (with their help) in fuchsia and green cotton. I've handstitched them on a square of natural linen and then put the pincushions together with fuchsia canvas (leftovers from these bags) for the back.

 
Stuffed with super soft polyfill, of course!

The pincushions are not so big. They can stay together on my hand:


The first pincushion is more pink, the second is more green. Probably I'll give the first one to mum and the other one to my aunt.
I hope they'll like my gift :)

If you're thinking I'm a bit obsessed by pincushion this year, well, I do agree! :)
I've made 6 of them already and no will to stop!

Wednesday, 2 October 2013

02 OTT. 2013

02 OTT. 2013... this is what my new stamp says today!
 
 
Yes, another post about tools, after yesterday post. It's to thank S. for giving me this (totally unexpected) lovely gift :)
 
I'm so happy to have it to "write" the date into my moleskine everytime I want!
I've tested it today, early in the morning, before starting to write down some interesting notes from a book I'm reading these days.
Good way to start a day! A warm and sunny october day :)

And, together with my new stamp, I want to let you look into my moleskine's page and on my desk.

The page was white, but now, after an intense writing session, it's full of black&green words:


I often glue images I like (from magazines, etc.) on the pages, because I like to decorate the space when I write, expecially when these images say something to me.
I'm gluing a lot of birds recently, because I decided that birds are symbols of my dad for me (he was an expert of these little creatures).
I'm working a bit about this symbol, now, drawing and making collages. Believe it or no, I've almost finished a bag with birds! :)

On the desk I also have an interesting book about Palermo's churches (for study) and a pink flower my little niece gave to me as a gift (it is my new book mark).

What is on your desk today?
Have you some new tools you want to share with me?

Tuesday, 1 October 2013

I don't know its name, but it's funny (edited)

While I was still in Northern Italy, the first days of September, one day I decided to spend some time tidying up some drawers in my old bedroom.
 
And I found a lovely thing I received as a gift when I was a child.
 
It's a thing "to make art".
I don't know its name, I only know it's super funny. Similar objects were almost everywhere during my childhood (I remember I had a smaller version, too).
 
Does its photo say something to you?
 
 
You put your pen into one of its "holes" and start moving. This instrument help your hand to move till you have finished a whole round.
You can decide to remove the instrument to see the result or (more funny!) decide to go on, without moving it from its position on the page, and re-start with other shapes to mix them together.
 
The result is a sort of mandala, an hypnotising work of art you can't get tired of.
Yes, making these circles is addictive (the reason why I've decided to leave it where I've found it, because I don't need other time-consuming things here at home, eh eh).
 
But I brought all the circles with me, of course. And I cut them to glue my favourite into my moleskine.
 
 
I think they can have several funny applications... for example they can decorate cards, or became part of gift wraps, or be hanged up the Xmas tree like balls.
 
Do you know this funny tool?
Can you help me in giving it a proper name?
Thank you in advance!!!

EDIT: My Etsy Italia Team mates say its name is "spirograph". Mystery solved!
I'm a proud owner af a vintage spirograph, eh eh :)

Thursday, 19 September 2013

A precious gift from the past

A lovely woman died some days after my dad.
She was 76 years old. Although she was 40 years older than me, we became friends, thanks to our same passion for books and art. She used to give me her magazines about museums when she had finished to read them :)
She was a lovely woman. So sweet and funny!
 
Her apartment was just upon AuntFran's shop, so these two women used to spend some time together almost everyday and became very close.
When she died, her relatives said to AuntFran to pick up some objects of her friend, to keep as a memory.
 
In her sewing basket, among other things, she found this curious beauty:
 
 
What is it? Unscrew it:
 

It's a traditional wooden case for needles.
AuntFran picked up it for me. She thought I would appreciate it and she was right! I love this kind of old objects and I will think to her owner (that funny and sweet old woman!) every time I'll see it in my sewing dresser.
 
As you can notice by the photos, I'm working on my white desk again.
Yes, I came back in Sicily saying a warm "Goodbye" to my beloved Northern Italy.

Tuesday, 16 July 2013

New craft-obessions: pincushions!

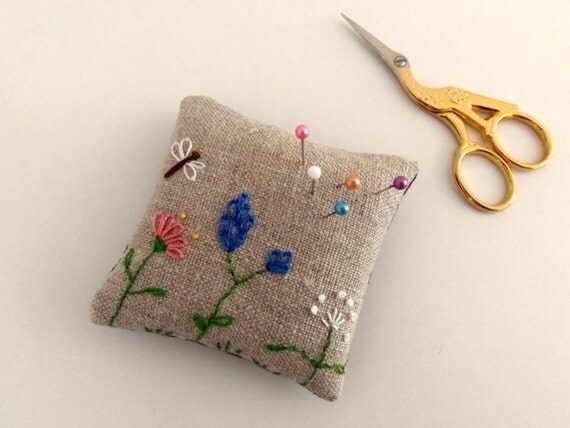
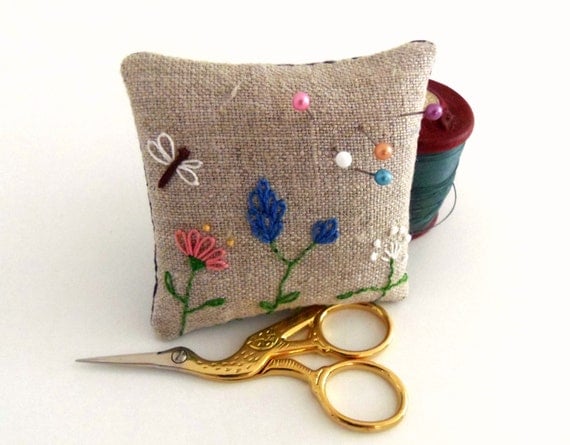
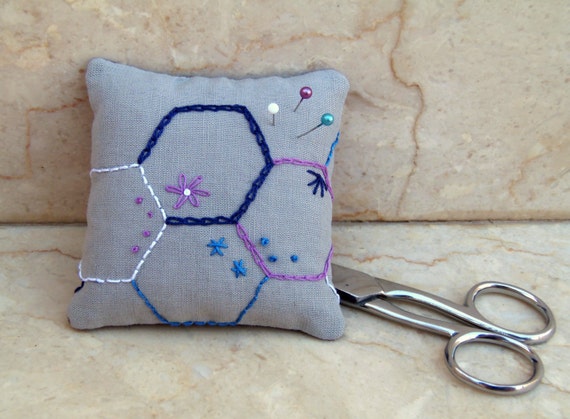
After snowflakes and bows, a new obsession came to me: I started to make little pincushions and now I can't stop.
Help me, please!
:)
 
All started with a tiny linen leftover (from this wallet): a square abandoned in my box of embroidery tools waiting for its destiny.
As I saw it last saturday, a new idea jumped in my mind: pincushion! Why not?
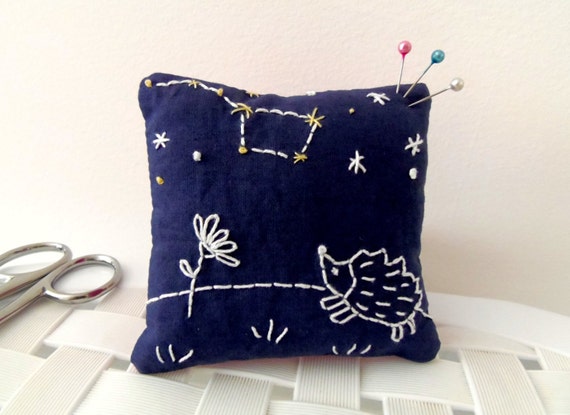
I embroidered it with my usual themes (fields of flowers, nature, etc.), found a piece of fabric for the back, put all together and stuffed with polyfill.
 
 
I liked the process (and the finished object, too) so much that I had to make another one the same day, eh eh.
 
This kind of pincushions are very easy and quick to make. I love working on small things, expecially on squared surfaces; my imagination works well in finding different way to decorate them. 
Always welcome little embroidery projects to finish in half an hour!
 
I'm so happy for finding a new project for my fabric scraps!!!
I couldn't resist in including my new bird scissors in the photos! I bought them in my latest vacation, I was with mum, a sunday morning.
 
Well, I want to show you the other three pincushions I made.
 
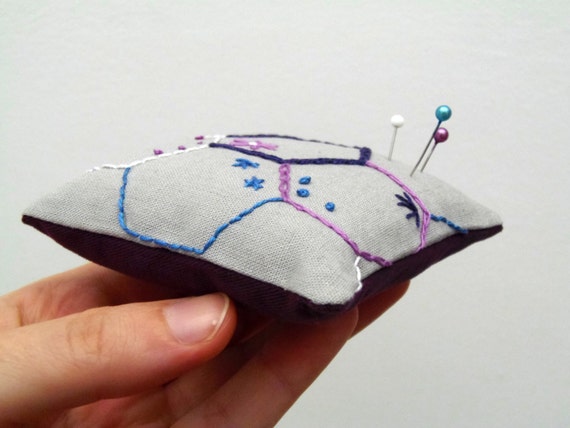
One speaks about my love for hexagons:
 
 
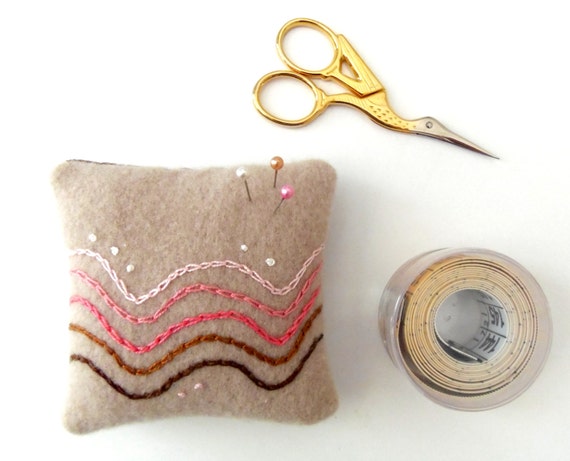
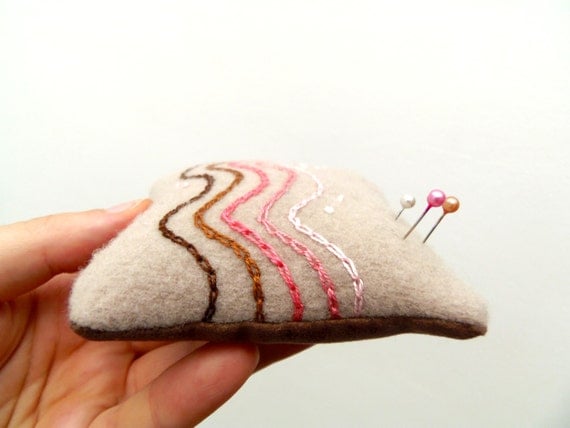
My favourite is made of the same felt of my bunnies and has a motiv of shading waves. I made it for this challenge (you can vote for me, if you like it).
 
 
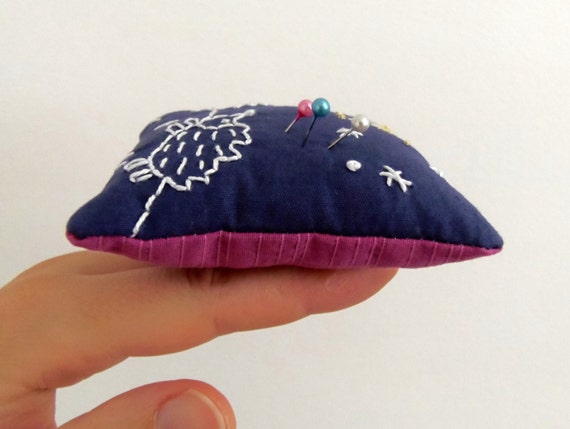
The last one has a hedgehog watching The Great Bear (Ursa Major):
 
 
They all have a brown back, except the hedgehog pincushion.
I've uploaded them in my shop (price: 10 €).

Why don't you make one for you?
Don't forget to show it to me when finished :)

Sunday, 17 March 2013

Saving happy memories in a photobook

 
In January I've been very busy in a photographic/family project I really loved!
I made and ordered a photobook with all my favourite photos taken during 2012! The perfect project to start a new year in a more conscious way of what you had by the previous year and what you want to go on having in the next.
 
I'm posting about it only today, almost 2 months later, because I couldn't take good photos of my book. But after some other bad attempts I decided to give up: you are going to see bad photos, my friends, sorry!
 
It is a Blurb photo book.
I made using their free and online Bookify software.
To  be honest... I started donwloading Booksmart from their website, because it has much more layout possibilities and so on.
But I understood that it was a bit difficult for me, a very beginner in this kind of things, so I switched to Bookify soon.
 
 
Bookify is simple to use, but it doesn't give you the possibility to have fun with layouts and grids like Booksmart. It puts only one photo in a page.
And my idea was to fill the pages (and covers, too, as you can see in this first shots) with grids and collages of small photos, because I had a very big amount of pictures to put in the book.
 
A big problem for me... but, hey, big idea... you can alway use Picmonkey! :)
 
I used this free online tool to make all the collages and grids I was needing and then I saved it in my laptop.
Each collage counts as a single photo, so I could go on to the second step: upload each picture (made of multiple shots) on bookify!
I jumped over the obstacle, eh eh!!!
Yes, this process is a bit time consuming and muddled, but it gave my the possibility to have what I want!
 
 
The book is organized by month.
Of course you could make year-books organizing them in different ways: by theme, random disposition, etc.
But I like to be "chronological" in this kind of things. I like to see time and seasons passing away like in a well-constructed travel.
 
 
I didn't add explicative text to my pages, because images speak clear to me and I don't need written notes!
 
S. really liked it and we decided to make a photobook every year. We strongly believe that saving happy memories is important for a family.
And digital photos are always in danger if saved only into our laptops and other devices that can crash without warnings!
And, the most importan thing, making a book is... funny!!!
I hope this post is inspiring you to try! :)

Friday, 1 March 2013

Making bunnies - behind the scenes

I like to take photos of me and/or my tools when I'm making things.
I have a lot of these snapshots in my folders and they want to be published, eh eh. Showing the creative process is a good thing, because it can inspire other people and make clear how you work.
To me it's important also because these photos leave a sweet memory of happy moments.
 
So here some photos of the making of my Easter bunnies.
Sweet memories of a quiet and creative sunday morning.
 
All started with a felted sweater: I cut off a sleeve and drew the pattern.


It's now time to choose coloured fabrics for mouth and ears: rummaging time into my tiny scraps bags, the messy part of the project.
 
 
Then I fixed crocheted heart by hands and the mouth with zigzag stitche at the sewing machine: the bunny is ready to receive its embroidered face.
 
 
After sewing the ears I "packed up" the bunny with pins and put it under the sewing machine.


Turned inside out... it's time to pay attention to the backside, adding a pom pom [*]
 

A happy finished bunny, proudly smiling close to the sewing machine... isn't it lovely?
 
 
[*] I made that tiny pom pom with a fork, following this tutorial.

Monday, 3 December 2012

Happy mail again! Fabrics from Francesca

Do you remember my friend Francesca?She is the beautiful bride who asked me for a bag to wear on her wedding day last June.
She started to sew some years ago and bought fabrics to make things for herself, her family (she is mother of two lovely kids) and a little shop on etsy (now closed).
But for some reasons her passion for sewing stopped and now she probably hasn't the time to look for it. So she decided to give me all her fabrics *____*What a generous action!And what a lucky girl I am to have this kind of friends around me! Francesca lives far from me, in the north, so she shipped me the fabrics in a big (giant) box.
You can see in the photos what I found inside: an amazing selection of high quality fabric, in bright colors (oooh, Francesca loves purple like me!) and different kinds of fibers! A super lovely gift I'm not sure to deserve.
 
 
Of course I've already started to think to all the new projects I can work on using this fabrics. Since there's something I haven't used before in my sewing (like jute and waterproof cloth) I'll probably test something new.
And you know I love testing new tecniques and materials!
 
Let's give a closer glance:
 
 
So lovely!!! Beautiful variety of fabrics! Yay, happy me! :D
 
This is the second happy mail I received in the last two months (this is the first one). A small or big pack for you in the mail can warm up your heart for days, expecially when you are far from home, like me!
 
 
Related Posts Plugin for WordPress, Blogger...