Showing posts with label embroidery. Show all posts

Thursday, 3 November 2016

Christmas ornaments for introverts

I know, the title sounds a bit crazy, but it reflects some of my thoughts of this period. 

In my (rare) spare time I'm dedicating myself to get my shop ready for Christmas and so I've worked on new photos of my handmade ornaments (and also prepared a coupon code to have them with a 15% discount).

decorative stars for christmas home decor
My ornaments
They are little and simple ornaments. Totally my style!
Some are made of cornastarch clay (stars and snowflakes) painted by me in white. Some others are made of recycled materials. My favourite are the felt embroidered stars.

They are different but all of them are rustic, nature inspired, traditional and small.
But, the most important thing, they are not too much eye-catching.
And so I said in my mind: "Hey, they are for people like me! These ornaments are for introverts!".

cornstarch clay ornaments with snowflakes


What about Christmas if you are introvert?

I'm not a very "Christmas person". Oh, no, I'm not the Grinch, I'm only and introvert girl! Proud of my introversion.

You can hear introverts saying that:
  • They don't like the wastefulness and the confusion of Christmas time
  • They don't feel great at crowded parties (even when only close family is involved)
  • They don't like to go out and spend entire afternoons looking for the right gift
  • They don't like bulky home decoration which steal part of their living space

I know that, probably, introvert people during Christmas time like better to:
  • spend a full afternoon at home, on the sofa, watching a good Xmas movie
  • cooking alone Xmas dishes for very "private" christmas lunches / dinners
  • avoid too much noisy things (like those Santa's puppets mechanically saying "OhOhOh")
  • enjoy some time of rest at home, dedicating themselves to hobbies and quiet activities
  • buy gifts on-line and not in real shops after hours and hours of wandering in crowded shopping centers
  • decorate their nest with gentle and not too much eye-catching ornaments

And it's probably because I'm introvert that I like to make all the little and "kind" Christmas ornaments you can find in my shop.

They don't occupy too much living space. 
They don't make noise or bling-blings of any kinds. 
You can buy them on-line if you want to offer a little gift to someone special (a very selected one, I presume).
They are perfect for a quiet, resting, loner and silent Christmas time in our precious cave, ehm, nest! :)

painted ornaments for christmas

What do you think?
Does my post sound odd, annoyng, Grinch-style? 
Is there something familiar for you in the introvert Christmas I depicted in this post?
(wait, are you introvert or extrovert? a free test for you) 


fabric bows for christmas


Study the topic a bit more with this posts I found recently: 

Tuesday, 14 July 2015

How to display little embroidered works (the not professional way)

In my latest post I wrote about the fact I've decided to display my little embroidered fox and showed you the result.
While working on this project I've taken some snapshots of the process. What do you think about converting the whole bunch in a sort of tutorial?
Great idea, I know :P

I'm calling it "How to display little embroidery projects". It's not a professional way to display or frame pieces of embroidery. Only my way.
Hope it will inspire you to pull out the drawer some unfinished embroidery projects (I'm sure they are lovely) and display them in your home.
I think it can be a smart idea to give a new life to some old/vintage pieces of fabrics.
What I like of this process is that glues are not included. Only fabric, felt, needles, thread and recycled cardboard!

Let's go!

framed cross stitch works

First thing to do: cut a recycled cardboard and round the corners (it will help to get a finer result). The cardboard has to be a bit smaller that the piece of embroidery you are working with, of course.

cross stitch fox framed

Second step: place the carboard on the back of the fabric and fold each corner in the way you can see in the photo-collage below.
Help the fabric and the corners to stay in their place with some hand-stitching. You can notice that I've connected the opposite sides of the folded fabric with some long stitches. This trick made on the back helps to have a tight effect on the front.

embroidered fox in a frame

Step 3: cut a square of felt (synthetic in my project) and decorate it (optional; I've embroidered '2013', because I was sure I've completed my fox two years ago, but I was wrong).
Fix the square with some stitches made by hands. I suggest to use blanket stitch (love its delicate look), but you can use different methods if you prefer.

madamerenard tutorial

Step 4: it's time to hang up your work of art. Simply fix a little noos on the back and find a nail on the wall.

adding a noos to the  back of a fabric card

But if you (like me) are in the mood for arranging it on a shelf you can alter the shape of a paper clip and insert it between the felt cloth and the cardboard. It will do the work of a frame foot.
Interesting, uh?
:)

tutorial by madamerenard

Love to have my fox in my studio's bookcase :)


cross stitch fox

Other methods to display or frame embroidery used by other people (but a bi tmore expensive than mine):

Let me know if you like this tutorial and share with me your embroidery masterpieces leaving a comment!

Saturday, 11 July 2015

My embroidered fox as a work of art

I wrote a long summer list of things to do at the beginning of June and I wrote the word "done!" beside a lot of my aims this week. 
Very proud of my self and my productivity!
The funniest thing in the list was to give a purpose to a little work of cross stitch I finished last year: it's a  fox face, important for me because foxes are a sort of totem for me.

I could make a soft key-chain, like I did with other little squares of embroidered fabric (here the tutorial, if you're interested), but I was in the mood for something different: my will was to transform that little piece of embroidery in a work of art, something I can display in my studio and see everyday.

I'm going to write something about the process soon (I've taken a lot of snapshots while working on this projects that I can write a tutorial), but today I'm showing you how cute my fox is.

cross stitched fox

I've arranged it on a square of recycled carboard and finished the back with a square of red faux felt. Then I added a cord to hang it on my studio's walls, but I decided soon to like best a different solution: I found the way to make it stand-up on one of my bookcase's shelves, near Carina and Lucia.

how to frame embroidery


This isn't the only one fox who lives in this part of the home, because there is also Felix the fox paper doll near the door!
Love this tiny piece of art in my studio! :)

Wednesday, 8 April 2015

Tutorial: make a soft keychain! (embroidered or not)

sewing tutorial for beginners - DIY keychain

If you liked my soft+embroidered keychains, you probably would like to make one for yourself instead of buying it.
So I decided to collect in a (sort of) tutorial all the photos I've taken while making the blue deer keychain.

It's a super easy and short project:
- you don't have to use an embroidered front panel if you can't embroidery: you can simply sew together two squares of fabric of your choice
- you can make these keychains even if you don't own a sewing machine: you can sew by hands, it will take short time because they are very small
This projects is for beginners, too! You don't need complex sewing skills, but only a few basic notions!

Make with me a soft stuffed keychain!

WHAT DO YOU NEED


- two fabric squares (one of them is embroidered, if you want) - cm 6,5 x 6,5 (approx. in. 2.5x2.5)
- scissors
- sewing thread
- cord (mine is recycled) - cm 8 long (approx. in. 3.5)
- pins and needles
- stuffing fibers (I use polyfill, synthetic)
- fliseline or other kinds of fusible interfacing (optional)

OPTIONAL: STRENGHTEN YOUR FABRIC WITH FLISELINE


If your fabric is lightweight, my suggestion is to strenghten it by ironing on the back a thin sheet of fliseline. It will help also your embroidery to stay in its place. I usually do it for all the embroidery projects I want to sew.
This is an optional step. You can jump it if your fabric is strong enough.

ARRANGE THE CORD
Fold the cord in two and fix the extremities with some hand-stitches.


Then place it on the half point of the top side and fix with a little seam near the perimeter.


SEW THE KEYCHAIN
Place your fabric squares, fix with pins and sew.


Don't forget to leave a little segment open!


My suggestion is to make rounded corners: they come out better when you stuff squares or rectangles.

Drawing a sewing line can help in making a precise seam, expecially when the thing you are sewing is small.


Be carefull! Don't sew the cord!

TURN INSIDE OUT AND STUFF


The cord, hidden inside, will help you in turning the square inside out. 
A scissor or a pen is helpful for pushing out the corners and the sides. 
When the shape satisfies you, stuff the square with a good amount of stuffing fibers.

CLOSE THE HOLE


With some invisible stitches, made by hands, close the hole.
Invisible stitches are not difficult; they are called "blind stitches", too.
You can find lot of tutorials on line: here a good one!

This is how your stuffed square will look:


FINAL TOUCHES
Add a metallic ring and your keys! :)
Your keychain is finished!

sewing tutorials

And now that you know how to make a stuffed keychain... dont' stop!
You can make others for you friends and relatives (or buy mine in my shop).

sewing tutorial for beginners: embroidered soft keychain

Let me know if this tutorial is useful! Your feedback is important to me.
If you have realized a stuffed keychain following my instructions, leave a link in the comments, so I can see it! :)

Thursday, 26 March 2015

Little embroidery projects: keychains!

I like little embroidery projects.
Something I can finish in less than one hour, watching tv after dinner or taking advantage of some little free time among my daily activities.
They please me and help me in staying creative also in busy periods of my life (I've recently found two new jobs).

You've probably noticed that my favourite themes for my embroidery projects are animals and plants, little landscapes with flowers and butterflies I draw by myself on the fabric. But I also like to work with simple cross stitch patterns, expecially when they are for animals' silhouettes.

You can find all these things in the new embroidered keychains I've added to my shop. All are slightly stuffed and have some upcycled materials in them.
Three are squared and have cross stitch animals (a fox, a pink rabbit, a deer) with a contrasting fabric on the back.
Three are circular, made of synthetic felt, with animals (hedgehog!) and plants, 100% made by hands (no sewin machine involved).

embroidered keychains with animals

embroidered landscape on felt keychains

Making them was very funny!
I don't remember how the idea to make embroidered keychains came to me. One day I started to make them, following a sort of creative instinct.

They make a little pile of eye candies on my desk now! :)


Here is a collage with all my embroidered keychains together:


Do you like them?

Monday, 9 February 2015

Cross stitch: hate or love?

I've developed a strange obsession for cross stitch recently and I don't know if I hate or I love it.
I hate the fact that you have to count all the squares, because, you know, I like free embroidery, without rules and patterns.
But the final result, so minimal and rustic/old style, is beautiful to me. I really like it! So, uhm, although I hate to do cross stitch I'm going on stitching because I like the final result. So odd!
I'm constantly pinning cross stitch patterns, expecially when my favourite themes (nature, flowers, animals) are involved. Nordic / scandinavian style is always welcome for my embroidery, too!

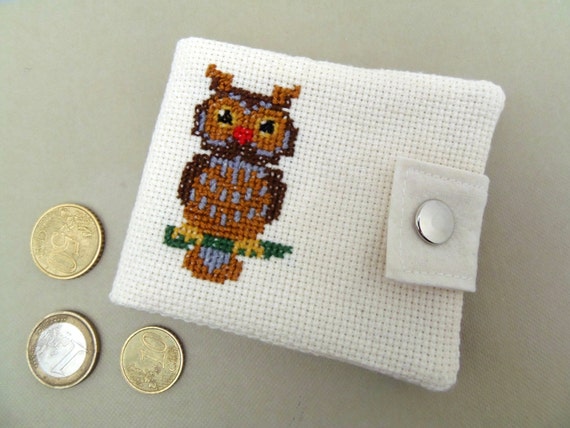
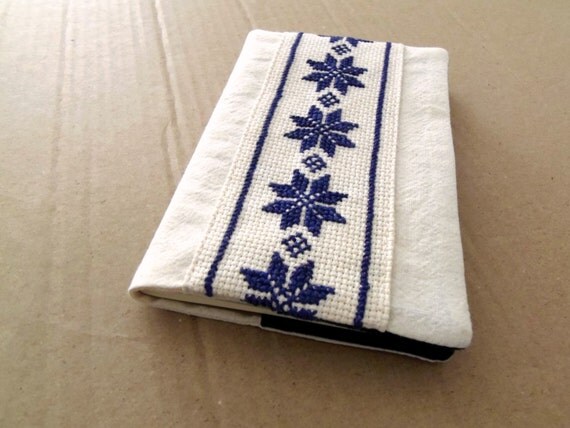
These are my latest cross stitch works.
I embroidered small scraps of fabric and mixed them to other materials to make small accessories for my shop.
Take a look!

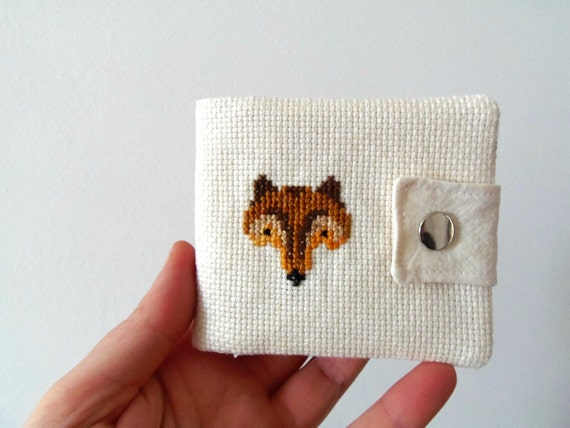
Fox wallet (my favourite!):


Do you like cross stitch?

Wednesday, 4 February 2015

Work in progress


I took this snapshots yesterday, while working to a custom order for my shop.
I like "work in progress" photography, I like documenting my creative process.
Looking at these simple images I thought our life is a work in progress. We evolve and change over and over again. And it's good.

This is probably the reason why I've apparently lost my interest in blogging. Something has changed in me. I can't find my blogging voice right now.
But I'm doing and making like a crazy girl and I'm happy.

Yesterday, after two months of no blogging, I felt the urge to share something with my readers.
I'm here again. Maybe.

Say "hello" in the comments if you are happy to see me again. I probably need some greetings to restart writing here.

Sunday, 5 October 2014

Cross stitch part III: the pink cat pencil case


This is my third project with the cross stitch silhouettes I embroidered this summer, after the pincushion with a red deer and the little snowman ornament.

What to do with a pink cat?
Something for a little girl, of course. And a little girl probably started school recently, so... a pencil case! Good idea!
I decided to use the cat on the flap (closed by a metalli snap) and to go on and stronger with pink making a fuchsia case. I also tested a new (to me) kind of pencil cases (vertical), inspired by these clutches by Ithinksew.
Quite satisfied by the final result.
I think some little girls would love to bring it at school.
It's available in my shop!


I hope you are having a happy Sunday.
Here in Sicily it's raining and I'm sewing new things for the shop (bags and accessories). I had a storm of new ideas the last days, after tidying up one of my fabric boxes.
I'm cooking yummy veggies, too, and working around the house (I feel like it will never ready and finished).
Yes, I'm having a quite Sunday at home. Very happy :)

Wednesday, 10 September 2014

Little snowman: cross stitch part II

It's probably toooo early for snowmen and Christmas ornaments, I know.
It's still summer here in Italy.
But I followed a cross stitch pattern to make a little snowman recently (part of it in the corner of this photo) and making a Christmas tree ornament looked a great idea!

So... this is the new item in the shop: a little soft ornament made of fabric and thread with an embroidered snowman on one side.


I added a red bead for the nose. Isn't it similar to reindeer Rudolf?
Two silver metallic buttons and a black cord to hang it:


Cotton fabric on the back in sand and white and polyfill fibers inside:


Do you like it?
I do.
But the most important thing is that making this kind of little objects makes me happy. Crafting brings me an important amount of happiness day after day.
My heart sings while working to my things.
Can you understand me?

Monday, 8 September 2014

Cross stitch

When I was at mum's home for the holidays I've done a lot of things that made me happy: reading, picking up fruits and vegetables in the garden, cooking, riding my bike in the country, enjoying animals' company (and people, too!) and crafting a bit.
I've recently uploaded some photos of my holidays in my Flickr album.

One day I found a scrap of a particular fabric used in Italy for cross stitch; it is called "tela ida" in italian, I don't know its english name.
Mum wasn't interested in using it, so I decided to test cross stitch. I had a pattern to try, a pattern with a fox, my favourite animal!

Making the fox was quite funny, so I decided to go on embroidering other animals (I saved the patterns in this Pinterest board... lot of foxes, cats and butterflies, if you are interested).


And now that I'm at home... what to do with these stitched creatures?

I was particularly in love with that red deer and I cut the fabric to make a pincushion:


On the back there is a strong fabric with a red heart:


It has a christmassy and country look and I'm so happy about how it came out that I decided to sell it in my Etsy shop together with the other embroidered pincushions I made in the past.

I liked this little project and I'm going to find other uses for my embroideries, but I had to admit that cross stitch is not the best for me.
It is quite boring I(to me), because I hate to count all those squares to realize the images! I like best pattern-free embroidery, a thing I always do.

Monday, 11 August 2014

Taking photos on the beach + new items in the shop

The beach isn't only a good place to make art, but the special light we have there in the late afternoon, when the sun is almost gone, can be perfect to take photos.
In my last trip to the beach (looking to Mount Etna on the left and Ionian Sea on the right) I photographed the last thing I made for my shop: a tiny coin purse.

I like to take photos of my items outdoor. 
I get better images than indoor, because the light is more clear and "clean" and spreads gently all around the object. 
Of course I'm writing about the light you have in the shade or when the sky is cloudy; you will have very ugly photos (in my opinion) if you take photos under the burning sun.
I like so much the light and the sharpness I get in my outdoor photos that I started to bring my handmade items in the country, in the garden and even to the beach hoping to capture a good image of them.
And sometimes I'm very pleased by the result, expecially when I find a beautiful and rustic background like in this photo and in this one.

About taking photos of my new coin purse... I'm not 100% satisfied. 
Although the light was just perfect (clouds!), the color of the sand and the stones was too much similar to to beige cotton of the purse. 


So I went on using the sky and the sea as background: they give an interesting contrast, but these kind of photos aren't the best choice to be published on Etsy and be included into treasuries (although some buyers use beach photos: this is lovely).


But, since I have no time to take photos again, I uploaded them the same in my item's page.

It's a little coin purse I made sewing together by hands two of the granny squares I crocheted last summer (of course I've been inspired by my mp3 readers' case, always with me in my bag).
I added a beige lining (cotton fabric) and a zipper.

I've also added a new embroidered moleskine cover in the shop some days ago:


Photos taken indoor this time.
This cover is one of my favourite pieces in the shop now. I've experimented with monocromatic embroidery for the first time and I love it!

Flowers are a very common subject of my drawing and my embroidery and, as usual, I realized these without a pre-traced pattern on the fabric. The embroidery is improvized at the moment. This is my favourite way to embroider: I simply "draw" with needles and threads.


I'm selling this cover with its journal inside:


So these are the news about my shop. But I'm going to leave my home to spend the holidays at mum's home, so I think I have to set the shop in vacation mode for a while.
Related Posts Plugin for WordPress, Blogger...