Showing posts with label supplies. Show all posts

Thursday, 30 July 2015

Simple happy things - July 2015

Last year I worked on a little project and documented every single day of July (I've called it "July in 31 photos").
Not the same, this year. 
July is very hot, I feel like I'm very down on batteries and I am not doing special things to capture with my camera (although I think that there's something special for us everyday and that happyness is hidden into simple things). 

But of course I took some snapshots here and there.
They make a sort of visual diary of this month. Simple things in my life.

Critters around the house...


A super secret project I can't wait to share with you...


Some hard and satisfying work at the sewing machine...


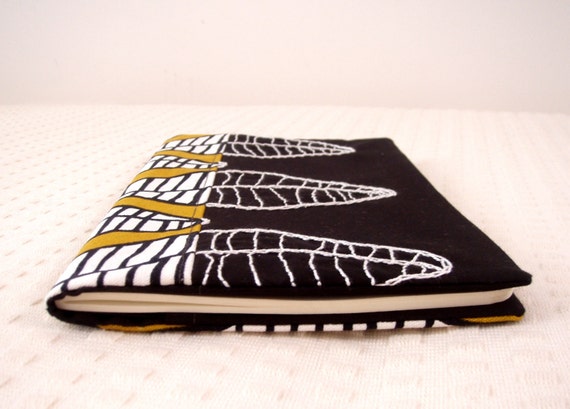
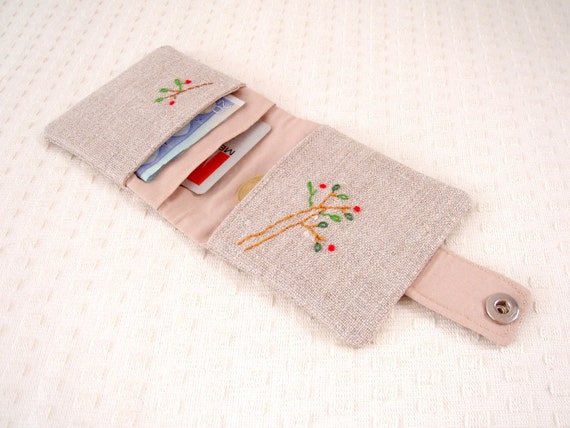
(completed this month: 5 bags + 2 wallets + 1 moleskine cover)
(bags 1 e 2 uploaded in my esty shop)

Summer yumminess...


Important birthdays and lovely birthday gifts by the kids...


Testing new tools (rivets!)...


Thursday, 7 August 2014

Art supplies offered by Mother Nature

S. and I spent some afernoons at the beach this week, a couple of hours after work.
We enjoyed the sun, the fresh air coming from the sea and the rest.
But I also made some beach art, eh eh, with suppplies given by Mother Nature in person: sand and shells :)


After a (not successful) attempt with a mandala (a sort of) I decided to draw something more easy to me: a flower in a sunny landscape.

This is my hand setting the last shell of the seagull:


You can make art everywhere. 
Nature gives you all you need!
Isn't it great?

Wednesday, 2 October 2013

02 OTT. 2013

02 OTT. 2013... this is what my new stamp says today!
 
 
Yes, another post about tools, after yesterday post. It's to thank S. for giving me this (totally unexpected) lovely gift :)
 
I'm so happy to have it to "write" the date into my moleskine everytime I want!
I've tested it today, early in the morning, before starting to write down some interesting notes from a book I'm reading these days.
Good way to start a day! A warm and sunny october day :)

And, together with my new stamp, I want to let you look into my moleskine's page and on my desk.

The page was white, but now, after an intense writing session, it's full of black&green words:


I often glue images I like (from magazines, etc.) on the pages, because I like to decorate the space when I write, expecially when these images say something to me.
I'm gluing a lot of birds recently, because I decided that birds are symbols of my dad for me (he was an expert of these little creatures).
I'm working a bit about this symbol, now, drawing and making collages. Believe it or no, I've almost finished a bag with birds! :)

On the desk I also have an interesting book about Palermo's churches (for study) and a pink flower my little niece gave to me as a gift (it is my new book mark).

What is on your desk today?
Have you some new tools you want to share with me?

Thursday, 19 September 2013

A precious gift from the past

A lovely woman died some days after my dad.
She was 76 years old. Although she was 40 years older than me, we became friends, thanks to our same passion for books and art. She used to give me her magazines about museums when she had finished to read them :)
She was a lovely woman. So sweet and funny!
 
Her apartment was just upon AuntFran's shop, so these two women used to spend some time together almost everyday and became very close.
When she died, her relatives said to AuntFran to pick up some objects of her friend, to keep as a memory.
 
In her sewing basket, among other things, she found this curious beauty:
 
 
What is it? Unscrew it:
 

It's a traditional wooden case for needles.
AuntFran picked up it for me. She thought I would appreciate it and she was right! I love this kind of old objects and I will think to her owner (that funny and sweet old woman!) every time I'll see it in my sewing dresser.
 
As you can notice by the photos, I'm working on my white desk again.
Yes, I came back in Sicily saying a warm "Goodbye" to my beloved Northern Italy.

Sunday, 16 June 2013

Little shop update

I'm still sewing, although I'm recently writing only about cornstarch clay, jewelry making and gardening :)
I love working at my sewing machine with fabric, pins, scissors and thread!
 
Recently I had some free time to make something new for the shop, two little bags totally "MadameRenard style": it means recycled fabrics + small dimensions + crochet by AunFran!
 
The first one I want to show you is a little elegant bag made of recycled upholstery fabric in a special shade of green (between mint and sage) with cream details.
I used another sheet (with a different - floral- pattern) of this recycled cloth for another little bag last March.


Pattern: Alanis clutch by Ithinksew.com.
I've altered it a bit, as usual, adding a chain (yes, the chain I've used for this bracelet) and omitting the central flap.

I haven't used a chain in a bag before, and I'm very happy about how it gives a charming and modern touch to a very simple envelope bag.
Love it! I'm going to make other bags with chain strap soon!!!


Then I listed in my shop a romantic zippered pouch:


AuntFran crocheted it for me (love the pattern!) and sent it with mum last april. She used a very high quality cotton thread; I added the zipper and the lining (cream linen+cotton, a strong a rustic fabric):


AuntFran sent me other two pouches made of the same thread but with different designs. My will is to find soon two zippers with bronze details to add them, because I really like bronze coupled with the rustic look of the thread!
I would like something like these, but I can't find them in italian shops (but only in asian Etsy shops)!
Do you know european shops on Etsy that sell this kind of zippers? Leave a link in the comments, please!

I hope to have time to sew new things for the shop soon!
Expecially bags! Oh, how I love sewing and selling bags!

Tuesday, 21 May 2013

Spring tops by me

I'm very late, I know, but a lot of things prevented me from uploading my new handmade t-shirts in Spring top sew along photo pool till today!
It went wrong this year, but I'm happy the same, because I have three new me-made clothes to wear and also because I've learned new things making them and I can say that my sewing skills really improved! :)
 
The first top I made is this one in blue:
 
I've cut the fabric (a very fresh and confortable cotton jersey) using a pattern into an old issue of "La mia boutique" (an italian sewing magazine) and altering it a bit. I like the color, but I'm expecially in love with raglan sleeves.
 
Making it, I used for the first time twin needles:
 
 
They give to your sewing a professional look. You have to try to understand how they work good!!!
I finished the neckline following this Megan Nielsen's tutorial and I'm really glad about the result :)
 
Then I started a more simple project: this sleeveless top in black+green jersey. I selfdrafted it, helped by a top I refashioned last year and perfectly fits on me:
 
 
The fabric is so fresh, elastic and lightweight... I can't stop to wear this top! Also because I like the mix of black and green very much!
 

The last one is another raglan sleeves t-shirt (I really like how the first one came out, so I decided to make another one):
 
 
This cotton jersey is my favourite. I used a part of it last year, to make a (so tiny!!!) t-shirt for my niece C.
I like stripes and colors, perfect for casual look days! :)
 
That' all!
Now I'm working on a skirt and some handmade jewels. See you soon!!!

Friday, 17 May 2013

Adding green to my life

After a very long time, I finally had some time for creativity! A couple of happy hours I spent playing like a kid with all was capturing my brain.
Reinvigoraiting! :)
A lot of minutes passed with corn starch clay (I recently knew it's also called "cold porcelain").
Mum gave me a small ready block in april and it's still fresh and soft.
I coloured part of it in green, using a drop (of blue tempera color) and a drop of green.
 
Green is my favourite color, but I haven't explored it very much in my creative life, so I decided to work around this color as much as possible, this year.
I've recently developed a passion for mint green (this little bag has a big part in this for sure!) and I think I've obtained it with my mix:
 
 
With the help of the back of a paint brush I realized some tiny rings, very similar to some candies I used to eat when I was a child, inspired by this Portia's tutorial. I don't want to make a so complex thing, but I like the idea to have mint candies in my jewelry in some ways.
 
Then I experimented with my vintage buttons to impress flowers and abstract decorations into the clay.
 
 
I've also darkened a bit the clay, making its color more similar to emerald green, another tone of green I really like.
 
Now my works are drying:
 
 
I made 7 "candies", 1 rectangular pendant, 2 small pendants with a flower (for earrings?), 1 big pendant with a flower (for a necklace?) and 3 in darker green with circles and dots.
Mum would be proud of me! :)
Can't wait to cover them with the transparent varnish and then put them together in new one-of-a-kind jewels!
 
Another thing I want to do with the clay is making tiny baskets. I'm not sure about the color to use for them. Maybe royal blue?

Tuesday, 16 April 2013

Lately


Lately...
 
... I did some spring cleaning on my sewing/study/everything table and couldn't resist in taking photos of my supplies and working space (and arranging them in a collage, you know, I'm addicted)
 
... I found a job!!! :)
Oh, so exciting!!! I work three days a week in a school not far from my little town (I teach history+geography). And during the short travel by car I enjoy an amazing sight of Mount Etna covered by the last snow of the year and "smoking"
 
... I made 3 t-shirts for me. I'm so happy to be able to se clothes and to find so cheap knitted fabric at the outdoor market to experiment with.
 
... My camera has a big problem :(
I can take photos, but the screen doesn't power on, so I have no idea if what I'm focusing. This thing is driving me crazy and this is why I'm not photographing my new t-shirts and uploading them into "Spring tops sew-a-long" this year! Annoying!!!

Thursday, 21 February 2013

Why is embroidering so awesome?

"Why is embroidery so awesome?"
 
 
This is a question I read in &Stitches (issue 3) and the super talented Jenny Hart of SublimeStitiching answered:
"I love that it’s inexpensive, non-toxic, relaxing, is accessible to anyone and endless variations can be accomplished with it. It’s thousands of years old, yet continues to undergo ever-evolving, contemporary applications. It’s an incredibly fascinating, deep and varied medium".
 
I agree. 100%!
But I want to add something to her answer.

To me, embroidery is awesome, because it's a way to draw (and you probably know that drawing is my first creative love).
Stitch+stitch+stitch ... you make a drawing! But not a simple a bi-dimensional drawing, but a "materical" one.
A special drawing you can touch and enjoy in a different way than normal drawing made with paper and pencils.
This is why I like to embroider without a pre-made pattern traced on the fabric.
I like to improvise and draw with needle+floss like I would do with paper+pencils.
To make the owl, I started with a vintage pattern and then I added other details going totally free.


Embroidery is awesome because of its modernity, too!
Yes, modernity, who knew it? Before starting I used to think that embroidery is an old-style thing. And the first thing I made is a "classic" embroidered tablecloth.
I couldn't see other possibilities.
But in these months I learned the lesson. Embroidery can be modern and a la mode. With needles, floss and fabrics you can do everything! No rules, no "obliged style".
I think my idea to continue the fabric's pattern with embroidery is a modern application of embroidery:


But I saw lots of super modern ideas on flickr or other websites; I'm going to share some of them one day.

Recently I bought some embroidery floss in new (to me) colors (first photo). Black, two shades of grey, violet, blue (I picked up this one probably inspired by Pam's Dutch Canal Houses).
Not sure what I want to make.
Probably a new pencil case, because a girl in Japan bought the first one.
And other things for sure, becasue the modern-embroidery-bug infected me :)

And you?
What is on your embroidery hoop?

Fell free to answer the question "Why is embroidery so awesome?".
I want to read what you think! :)

Wednesday, 5 December 2012

Super easy and cheap jewelry making!

Yesterday I was looking at some photos of handmade jewels and I found some lovely earrings and pendants.
They were very simple and I liked them very much.
They inspired me to make something for me: a pair of earring and a pendants. 10 minutes of work, I'm not joking.
Super easy and cheap projects.
 
I opened my box of charms, picked up some of them, added some recycled hooks and metallic rings...
 
 
... and assembled a pair of earrings and a pendant (added to an old silver necklace):
 
 
Nothing special, I know, but right for me :)
And a new (to me) craft, since I never make jewels or similar things.
 
The earrings are different, one as a key, one is my beloved hand with the word "handmade". Who said that you have to wear two identical earrings?
The necklace has a mushroom pendant. Probably I haven't written before about my love for mushrooms, but it's true, I love them, their shape, their being so "woody"! :)
 
If you're interested or want to make something similar to my new jewels, I usually buy my charms here (excellent service)!


Thursday, 27 September 2012

Tutorial: fabric bows!

Making fabric bow brooches is so easy and funny that I decided to write a tutorial for those people who want to try to make one of these cute things (and two, three, four... it's addictive, believe me!).
 
Please, if you follow my tutorial, write a comment to this post and share with me a link to your bows! I will be very happy to see your creations! :)
 
Are you ready?
Let's go!

(click on the photos to enlarge them and see all the details)


PRELIMINARY STEPS: Preparing materials and supplies
1. Materials: two stripes of fabric for the bow, one for the central knot, a security pin.
Fabric stripe's measurements can vary; my pieces are approximately cm 16x5 (bow) and cm 3x5 (knot) and the finished bow is cm 8x3,5.
2. Wrong side together, sew the bigger stripes on long sides
3. Then turn inside out: you have a sort of fabric tube. Press it with your iron to have a rectangle.
4. Prepare the central knot: fold the fabric like in the photo and press.
5. Then sew along both the long sides.
 
MAKING THE BOW
6. After marking the middle on the back of your rectangle, fold it like in the photo and stop it with a seam.
7. Fold in the way you like best
 
Now it's time for hand-stitching! :)
8. Stop the bow with some stitches by hand. Be sure your bow is strong before going on.
 

FINAL STEPS: making the central knot and adding the pin
9. Fix the knot with some stitches on the back of the bow and roll it around. Don't cut the thread, you need it for step 11.
10. The central knot isn't only decorative: as you can see it hides all the raw edges of the fabric and the seams. Also the knot as raw edges: fold inside the free end to hide them.
11. Fix with invisible stitches the central knot to the bow.
12. Add a security pin on the back.
 
The fabric bow brooch is finished:
 
OTHER IDEAS / VARIATIONS
- you can make the central knot in an easier way with a ribbon, like I did fot the lilac bow
- you can fold the rectangle in different ways: you can see one of them in the lilac bow (same fold in the front and in the back). Look for other bows in Etsy or with google images to be inspired! 
- if you haven't a pin with holes to sew to your brooch, you can use a common security pin: insert it between step 10 an 11.
- you can make monochromatic bows, if you prefer. But if you use a printed fabric for the bow, a central knot in a contrasting color is a good choice, expecially if it has a color that matches with the fabric of the bow (in my brooch: little red details on the bow and a red central knot).
 of course fabric bows can be used not only to make brooches! Fix them on your hair clips, sew to the neck of your Teddy bear to give him a nerd look, use them to decorate you home... endless possibilities, as usual!
 
The brooch made by me for this tutorial is in my shop, in case you like it and have no time to make one.

Wednesday, 5 September 2012

Acid green patchwork (+ a photo tutorial)

In my home there's a little bathroom near the kitchen. Its colors are acid green, white and dark brown (the door). Love this colors together!
Recently we bought a new piece of forniture in white.
I liked it, but its upper shelf seemed to me so empty!
So I decided to decorate it a bit with a piece made by me. It was a great occasion to use some green and brown fabric scraps I religiously saved :)
Time for patchwork!!!
 
This is what I made:
(I don't know how to call it, both in italian and in english... suggestions?)
 
The inspiration came from the book "The practical guide to patchwork" by Elizabeth Hartman. Of course her instructions in the book are for a big quilt, but I decided to work in smaller dimensions and to sew a block made of only 9 squares (adjusting the measurements).
 
I had a lot of fun taking photos of the whole process to share with you, but I didn't want to make this post too heavy, so I put them together in a collage with picmonkey.
The result is a sort of photographic (and intuitive) tutorial, similar to the one I made for my fabric peonies.
I also wrote a scheme of the measurements in my sewing notebook.
Hope these two little things will help you to make something for you or your home.
Fabric used for this project:
- dove-color leftovers (I used this fabric before for this bag for me and this bag for Gaf)
- 2 squares of fabric with paisley pattern (part of a batch of sample I received as a gift)... paisley is my new obsession!
- 1 square of recycled upholstery fabric (center)
- 6 squares of fabrics scraps I bought years ago from U-handbag shop, when Lisa, the owner, was selling bags of mixed leftovers of the fabrics she used to make her bag for the shop.
- dark brown fabric for the back
- a sheet of "spongy" interfacing
 
Now my bathroom is a happier place to be :)

Friday, 22 June 2012

Learning something new (embroidery!) with vintage things + a Moleskine page

[Too much things in this post to find a shorter title! Gosh! :P]
It's summer, it's so hot outdoor and at home (30-35° C during the day), life is exploding and I'm a happy girl :)
I love summer!
I don't care if I sweat too much or similar things; I like the sun and I'm that kind of person who have much more energy in summer than in (letargic) winter.
Here in my new home in Sicily we can stay outdoor after dinner and enjoy a lovely fresh air coming from the hills: it restores you after a hot day.
I like to sit on the balcony or out of the kitchen to breath this fresh air and make things: I often read or I finish some handmade projects.
This summer I have a new project to work on during fresh sicilian nights and it has been inspired by mum and AuntFran. It's a new things for me: it's an embroidery project! :)
During my last visit at home, AuntFran recycled for me an old linen curtain she made 25-30 years ago for my grandma (her mum). I remember that lovely curtain, because I slept in my grandma's bedroom for years, till her death.
Well, the curtain was damaged and AuntFran saved for me a part in good conditions and made a little tablecloth (for breakfast or for when my friends com to have coffee with me in the afternoon).
Mum suggested to decorate it with embroidery and gave me some patterns she bought (together with embroidery magazines) when I was a baby.
They have lovely drawings to transfer on fabric with your iron. So yesterday I finally cut some drawings I like and transfered them on my linen tablecloth.
I'm going to start to embroider tonight!
I have some colorful threads (high quality) mum gave me. I hope to use them wisely and make a good work :)
If you want to see what kind of drawings I'm going to embroider... take a look: I glued them (after use) to a page in my Moleskine journal...
... and decorated the page with some writing:

Butterflies, rabbits and birds... I can change myself :)
Probably AuntFran had something different in her mind when she gave me the table cloth (romantic flowers or fruits/vegetables), but it's MY project, right?
I hope to show you the finished tablecloth soon!
Would you like an iced coffee with me? We'll have it leaning our glasses on a recycled-handmade-new-vintage tablecloth! :P
Related Posts Plugin for WordPress, Blogger...