Showing posts with label creative process. Show all posts

Monday, 8 August 2016

Summer sewing in black & white: skirt and t-shirt

Hi, lovely readers!
How is your summer going?

Mine is full of trips, time with friends, work, books, beach and good food.
I'm not very creative in this period, but I've probably understood where the problem is hidden (multitasking is not always a good thing!) and I'm going to do some good planning to reconnect myself to my self-expression path.

Despite this not-very-creative mood, I made some new clothes for me. 
Summer is the best season for diy clothes, in my opinion. 
Easy t-shirts, or skirts, are very easy to sew and they help your wardrobe staying full of options during the hot season, when the pile close to washing machines can reach huge dimensions.

I made a skirt and a t-shirt!
They both are black and white (+stripes!). It's not a combo I used to like in the past, but something was calling me while I was looking for fabrics into my boxes.

The skirt (very easy pencil skirt)

handmade skirt

Something about this skirt:

  • I've bought the fabric more than two years ago and left unused, because I loved it so much that I was terrified to waste it (also because the piece was very small).
    It's a strong but lightweight and soft knitted cotton fabric, printed with different motivs of black and white zigzag stripes.
  • I've drawn the desing by myself following my body's shape and measurements. It's a very easy pencil skirt finished with an elastic on the waist:

elastic waist of a skirt


The t-shirt (stripes + flowers again!)


diy clothes

simple design for diy t-shirt

Something about this t-shirt:
  • Yes, the fabric it's the same of the stripes+flowers t-shirt I made last year (still loved and worne) but in black+white+sand and not in blue. I have a big piece of it, so I will probably sew something else in the future.
  • Design by me!
    I used a (bought) t-shirt that it's very confortable on me and used as a pattern.
    I added some bands on the sleeves because these details help handmade clothes to look less handmade (yes!).
    I'm not 100% satisfied by the neck line. It's always the part of the process that gives my troubles.


Future projects

I'd like to go on sewing in August.
It's to start something new, so in my plans there are:
  • Culottes! I've collected a lot of inspirations, tips, patterns and tutorial for culottes making in a Pinterest board. Something like this or this will be great!
  • A top with draped neck line following this tutorial. I hope it will help me in go over my problems with neck lines. I like this kind of neck line very much, too!
  • Leggins or easy pants in stretch/kintted fabric.

I'll share with you the finished projects, of course!


Do you practice easy summer sewing like me?
Share your work! I'm always looking for new inspirations!

Wednesday, 29 June 2016

Using Instagram to tell about my creative process

I've recently discovered Instagram (yes, a bit late, eheh) and immediately felt in love! It's my favourite social media and I find myself posting 1-2 photos everyday (only because I hold me to post 3 or 4 or 5).
I like that it's easy to use, quick (for busy people, too!) and with a strong sense of community inside.

You can find my profile under silvia_triv, if you like to interact or take a glance (or click on the black button on your right).

What kind of things I post?

To be honest, I've started to use Instagram to tell something about my job of tourist guide in Sicily
I write about it in a dedicated blog (mostly in italian with translations in english) and I use other on-line tools to spread the world with my joy and satisfaction about my job (a Pinterest board dedicated to Sicily, for exemple) and also to help tourists in some ways.
I decided to open an Instagram account as a support, but soon I started to post something else, here and there.

Now I use to post photos about:
  • me in action (there's also a tag used by me and other tourist guides: #touristguideinaction) and the beautiful places when I work (a big privilege!)
  • something about my life in Italy and Sicily: food, landscape, traditions, nature, events...
  • my life close to nature and country
  • my crafty life: materials, tools, my busy hands at the sewing machine, finished projects, parts of the creative process.
The last one is the best part of my being on Instagram.

As an artisan I think it's very important to tell people about your creative process. My customers are not buying products that are born in lifeless factories; there are very busy hands and a person behind handmade items.

People want to know who you are, how you work, what kind of materials you use, the values hidden in your small business / work ...

And (so much more important)... it's funny!

I can let my followers look at my prewashed fabrics drying on my balcony's cords (always prewash your fabrics!!!):


They can browse into my thread spools, so colorful:


I can show them how I use my handmade paper patterns to draw the cut line on fabrics...
... or my hands during a very hard step of bag making (inner zippers!!!) ...
... the finished items ...
... or even the 100% recycled packages I usually arrange (I do my best for the planet, you know!)...


Isn't it great?
Love it!

I'm a 100% Instagram enthusiast!

If you like, you can click on the images of this post to give them an earth or to follow me or to leave a comment. All these things will be really appreciated!

If you want to join this "creative process posting", take photos of you at work, or of your materials / supplies, don't forget the most interesting steps of your work and add one of the tags I use: #creativeprocess , #behindthescenes , #inthestudio (all of them, or the one you like best).

Do you post on Instagram to tell about your creative/artistic process?
Do you think it's important in some ways?
What are your favourite things to post on Instagram? 
Let me know! I'm sure I can improve my Instagram experience thanks to your comments!

Saturday, 5 March 2016

Creativity lately - crocheted boookmarks (+ a book)

Yes, this blog is about creativity, too! 
Eco-friendly and nature-inspired most of the time.
But my creativity went a bit unheard lately, because of my two jobs and my need to grow as a tourist guide (my dream job, you know, not far from becoming reality).

Of course I missed the solo moments when I am in the very good company of my sewing machine, needles and thread (and/or zippers, buttons, metallic hardware, crochet hooks, yarn and much more).
So I tried to carve 10 minutes out of the day, here and there, expecially to finish started projects for the shop.

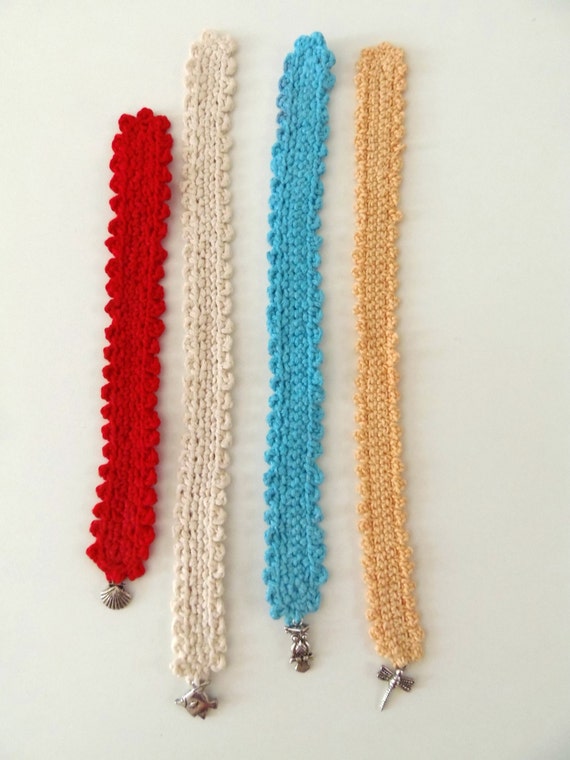
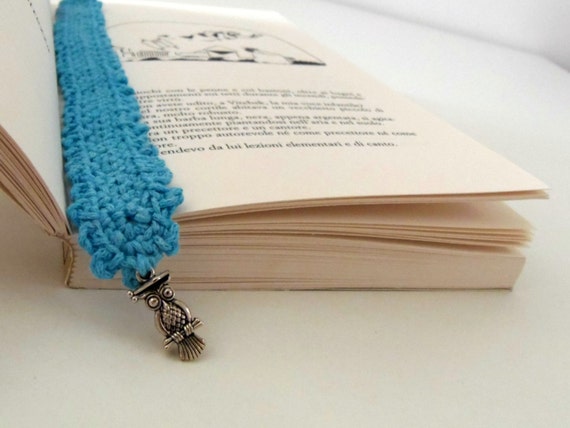
With mum's help I finished some crocheted bookmarks with charms (started during Christmas holidays!).
Aren't they lovely just because gift ideas?

This one in green with a horse is for S. (he loves horses!):

horse charm on handmade bookmark

It's super simple, because, hey, it's for a man! 
Only some rows of double stitch (not sure it's the correct name in english, sorry!) and a horse: it comes from a bracelet mum bought for 1 € some years ago; I saved the charm for my man waiting for the right project!

More complex and feminine crocheted bookmarks found their place in the shop. Here they are:

handmade bookmarks cheap gift idea

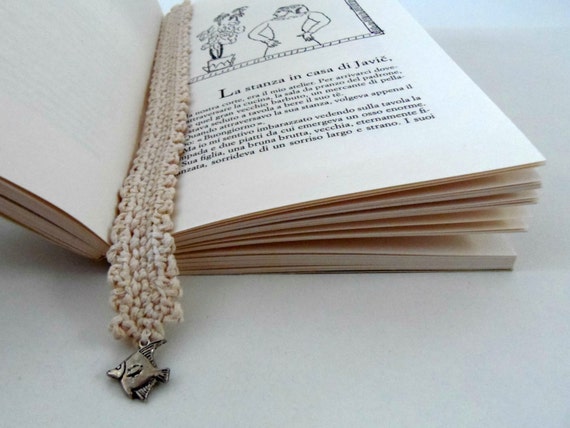
My favourite is the cream boookmark with a fish:

eco-friendly bookmark

It's 100% recycled and has that rustic + romantic look I love (perfect for my shop). 

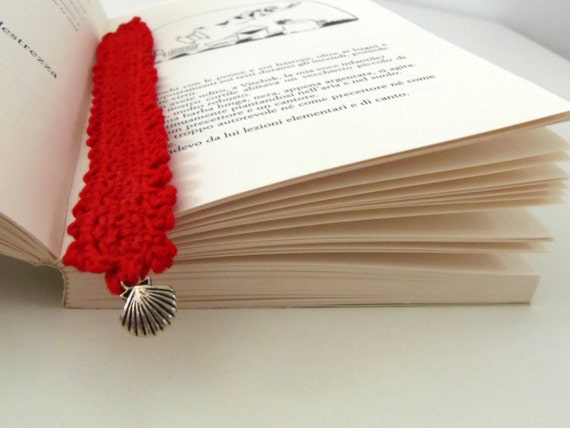
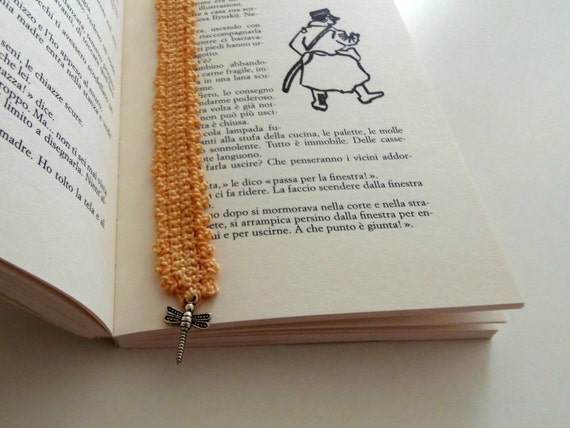
There are also:


Because all my creations for the shop are nature oriented, I decided to add only charms with animals!
I had some doubts about the price but I thought that 7 € + shipping is good. What do you think?

Are you wondering about the book in the snapshots?
It's a lovely autobiography by Marc Chagall ("La mia vita" is its title in italian, "My life" in english). 
If you like this artist like me, this book is a very good reading to understand something else about him and his art. And it has amazing illustrations by the author himself (who else?).
Highly recommended!

Friday, 12 February 2016

Blog makeover! Oh, yes!

After my complaint I decided for a blog makeover!

Yes, I love tooooo much to have a special little space to write in, to share my adventures in self-expression, to tell the world something about my steps into the sewing world and my inclinations for nature, country life and creativity in general. 
I didn't like the idea to give up.

So I've rolled up my sleeves and started a very big work. 
A lot of things to change, a lot of aspects to consider and to re-think.


blog makeover ideas


This is what I've done
  • I've made a new banner by myself!
    I was still in love with the one Francesca made for me almost 5 years ago, but it wasn't representing me after some important steps done in my creative journey. 
    I'm not very skilled with graphic design, but I realized something I like with very simple tools: Picmonkey collage tool and Microsoft Word.
    Oh, yes. 
    The banner includes written words about the key subjects of this blog (eco-friendly sewing, rural life and creativity) and a selection of photos from my little word. 
    It speaks about me because it's simple.
  • I've re-organized the right column, also adding some useful things like a contact form and social media buttons (you can find them at HopefulHoney blog).
  • The pages are new! New contents and photos, but (so important) I've added a page about tutorials and free stuff.
  • New palette! I decided for the couple light avio blue + light cyclamen.
    Do you like it? It speakes about my personality (I'm quiet, not noisy) and my love for all is nature inspired (I was thinking about flowers and water, when I picked up them).
  • New fonts! not only Verdana, but also Copse in different "sizes" for all the titles. And la Belle Aurore in the banner, because I've used it for my shop and it works well.
  • I've learned how to center dates and titles in all posts and I love the result!
  • I've added some suggestions for further readings at the bottom of every single post thanks to Linkwithin.

How I did?
You probably know I'm not very skilled in web design and other geeky things.
But I love when I can learn new things to make by myself.
So I've read a lot (a lot!) of tutorials on line and followed them.
Simple :)

Simple doesn't mean easy.
I've had some difficulties here and there, but I succeded after some attemps.
Now I'd like to know how to add some buttons at the end of the posts (you know... for sharing the content on google+, facebook or other social medias). I can do it!


And now?
I'm going to work on content.
I have to clear my mind about what to share here in my blog.
I can't simply think to speak about me and my creative journey when I have something interesting (in my opinion) to say.
It doesn't work.
I'd like this blog will be useful to other people.


What do you think? Your opinion is very welcome!
Please, let me know if you like the new look of the blog! Your opinion is very important to me!
You can write a comment also to leave a critique (negative, too, it's not a problem) or suggestions and new ideas!
Your comments are fuel for this blog!

Friday, 7 August 2015

Black and charcoal: new accessories for the shop!

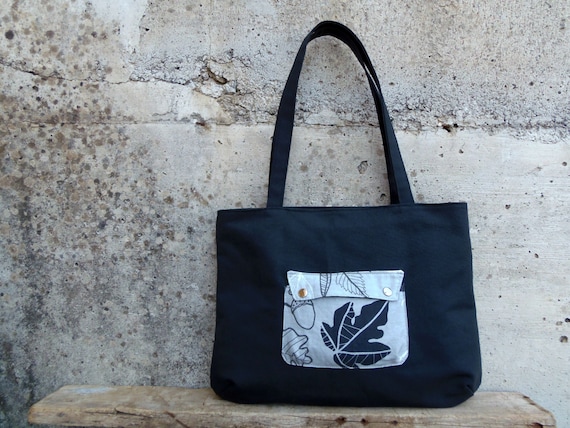
Recently I worked a lot with black and charcoal fabrics (+ light grey) and made new accessories for the shop! 
Not very summery colours, but probably perfect for autumn (it is very close, although here in Sicily we are having super hot summer days).

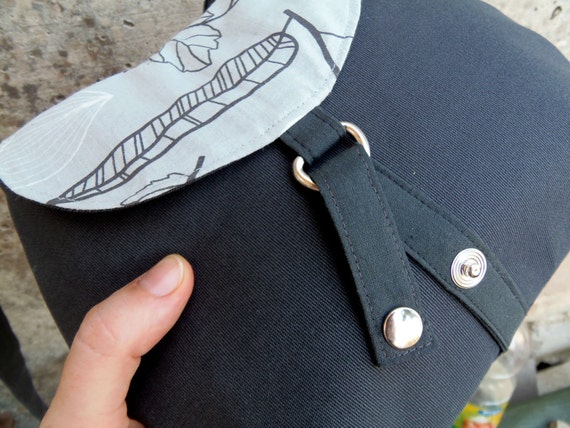
I was in the mood for sewing with some leftovers from this bag I made last March for my friends Vera [**] and also with some scraps of a beautiful Ikea fabric (colorful nature elements on black background... lovely!) [*].

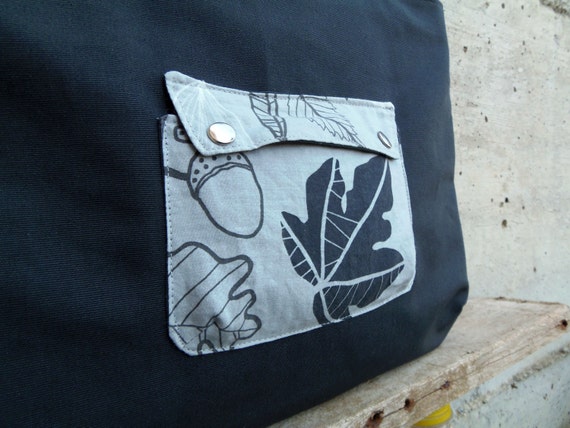
I started from a tote bag, altering a bit a pattern I drew by myself two years ago. I decided to add a recessed zipper instead of placing it on top (I'm totally in this kind of zippered closure this summer!); I've also opted for a wider pocket (thanks to darts on the corners).
This is the finished bag:

Grey shoulder bag made of fabric with leaves for autumn
Pocket on a tote bag
recessed zipper in a tote bag by MadameRenard inner zipper

More technical infos here.

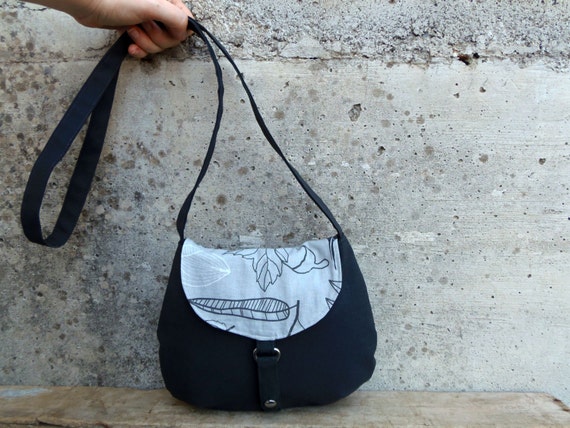
You know that I like to make small things, so I used the same fabrics for a small crossbody bag, too.

small grey clutch with leaves

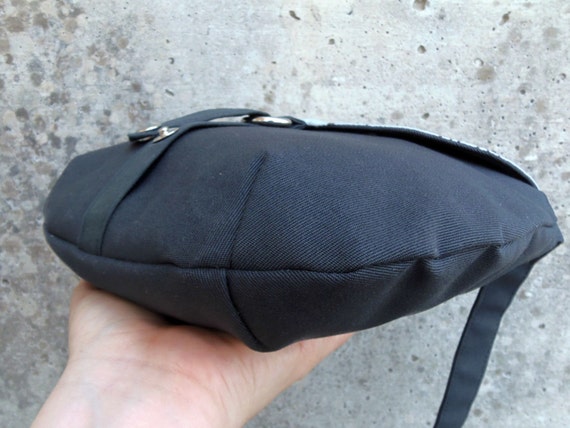
Also this design is 100% by me. I've drawn the pattern for this bag three years ago and used different times with satisfaction.
I like the dimensions if the finished bag and the inner space, but also some details like the closure and the contrasting flap:

small bag - snap for bags closures
Darts to add inner space to a bag

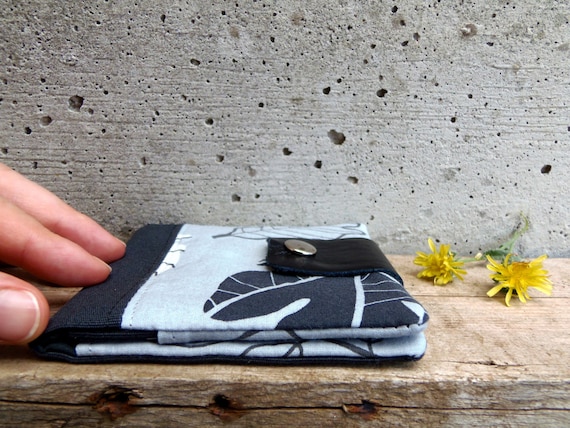
I couldn't resist and I decide to make a wallet to match with these bags!
Do you like it?

wallet with leaves
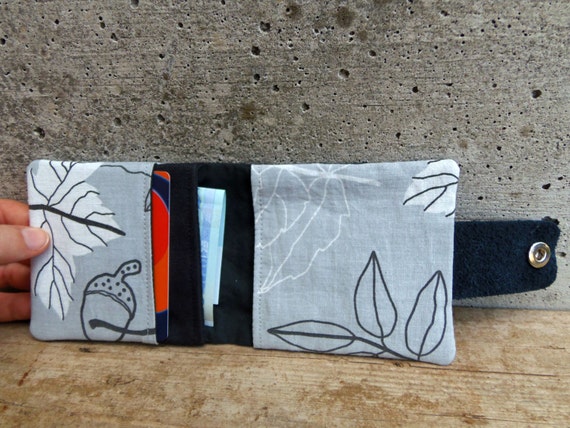
Pockets of a fabric wallet by MadameRenard

I've already written about my passion for making this kind of accessories!
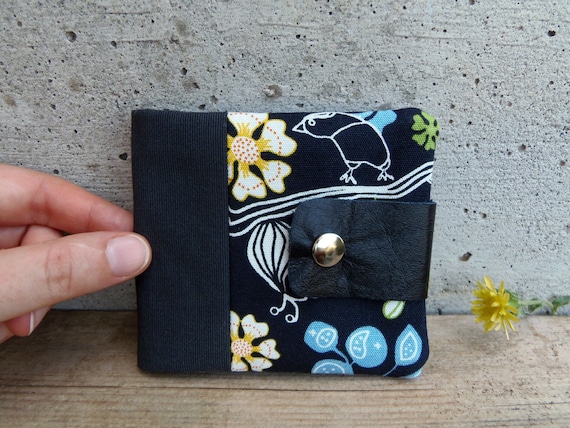
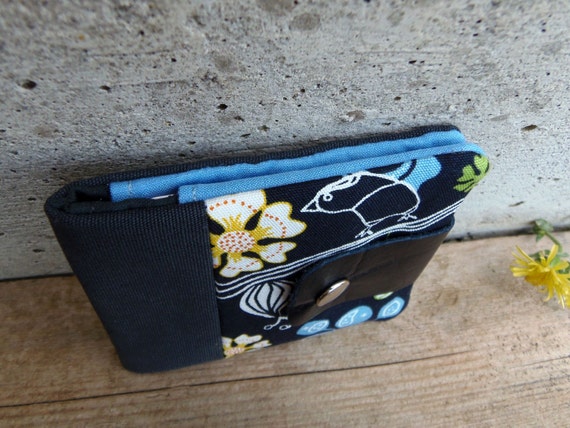
All my wallets have two pockets for cards and paper money and one pocket (closed by velcro or a zipper) for coins. They often have a little strip of recycled leather for closure, as in the case of this grey wallet and of the following one, the black floral wallet:

Fabric wallet in black with flowers and birds
eco-friendly materials for a beautiful fabric wallet

Love the stylized flowers and the little bird on top :)
The light blue inner pockets are made of leftovers of a beautiful eco-friendly fabric (organic linen + bamboo), given to me by Manuela, the owner of Retro eco à porter, an italian organic line of clothes (you can see the fabric "in action" on her Malva top).

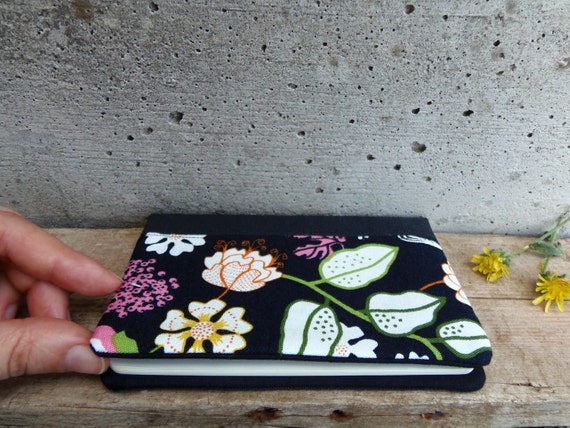
While making the wallet I cut the fabric for a Moleskine cahier cover, too.

Moleskine cahier cover pocket size made of black fabrics
Moleskine cover with flowers

It matches perfectly with other two accessories I've made in the past with this fabric and still available in the shop: a pencil case and a little pouch. They both are zippered and have recycled leather bottoms.

I'm very happy with these new items!
I don't use very often this kind of tones in my creations. I used to think that grey and black are boring, but I was wrong. They are very elegant and modern, expecially if you mix them with other colours.

Let me know which item among these is your favourite :)

[*] I can't find this beautiful fabric in italian Ikea shops anymore. I'm looking for it on-line, but I even don't know its name; if you know it, please, write it in the comments!

[**] I wasn't tired after all this sewing  and made a second bag for Vera: a tulip bag with a side band to increase to inner space. Very summery bag, thanks of its light sand fabric!
And now... rest time! :)

Thursday, 30 July 2015

Simple happy things - July 2015

Last year I worked on a little project and documented every single day of July (I've called it "July in 31 photos").
Not the same, this year. 
July is very hot, I feel like I'm very down on batteries and I am not doing special things to capture with my camera (although I think that there's something special for us everyday and that happyness is hidden into simple things). 

But of course I took some snapshots here and there.
They make a sort of visual diary of this month. Simple things in my life.

Critters around the house...


A super secret project I can't wait to share with you...


Some hard and satisfying work at the sewing machine...


(completed this month: 5 bags + 2 wallets + 1 moleskine cover)
(bags 1 e 2 uploaded in my esty shop)

Summer yumminess...


Important birthdays and lovely birthday gifts by the kids...


Testing new tools (rivets!)...


Tuesday, 14 July 2015

How to display little embroidered works (the not professional way)

In my latest post I wrote about the fact I've decided to display my little embroidered fox and showed you the result.
While working on this project I've taken some snapshots of the process. What do you think about converting the whole bunch in a sort of tutorial?
Great idea, I know :P

I'm calling it "How to display little embroidery projects". It's not a professional way to display or frame pieces of embroidery. Only my way.
Hope it will inspire you to pull out the drawer some unfinished embroidery projects (I'm sure they are lovely) and display them in your home.
I think it can be a smart idea to give a new life to some old/vintage pieces of fabrics.
What I like of this process is that glues are not included. Only fabric, felt, needles, thread and recycled cardboard!

Let's go!

framed cross stitch works

First thing to do: cut a recycled cardboard and round the corners (it will help to get a finer result). The cardboard has to be a bit smaller that the piece of embroidery you are working with, of course.

cross stitch fox framed

Second step: place the carboard on the back of the fabric and fold each corner in the way you can see in the photo-collage below.
Help the fabric and the corners to stay in their place with some hand-stitching. You can notice that I've connected the opposite sides of the folded fabric with some long stitches. This trick made on the back helps to have a tight effect on the front.

embroidered fox in a frame

Step 3: cut a square of felt (synthetic in my project) and decorate it (optional; I've embroidered '2013', because I was sure I've completed my fox two years ago, but I was wrong).
Fix the square with some stitches made by hands. I suggest to use blanket stitch (love its delicate look), but you can use different methods if you prefer.

madamerenard tutorial

Step 4: it's time to hang up your work of art. Simply fix a little noos on the back and find a nail on the wall.

adding a noos to the  back of a fabric card

But if you (like me) are in the mood for arranging it on a shelf you can alter the shape of a paper clip and insert it between the felt cloth and the cardboard. It will do the work of a frame foot.
Interesting, uh?
:)

tutorial by madamerenard

Love to have my fox in my studio's bookcase :)


cross stitch fox

Other methods to display or frame embroidery used by other people (but a bi tmore expensive than mine):

Let me know if you like this tutorial and share with me your embroidery masterpieces leaving a comment!

Wednesday, 8 July 2015

A parade of handmade spring/summer tops!

This summer I'm not working only on bags and other accessories to improve my shop's offer!
Since it's summer I'm into tops making! :)
I really like to make fresh and comfortable t-shirts and tops using knit fabrics and cotton jersey (I usually buy them at our outdoor market and are very cheap - they are leftovers - but high in quality).

I have three of these handamade spring/summer tops to show you today.

The stripes + flowers top

striped and floral top

A very simple design. It's a self-drafted top, t-shaped, without sewn sleeves, but with a curved hem on the bottom.

curved hem top

The things I like about this top is that it's very fresh and soft and it has some of my favourite peculiarities for clothes: the colours (blue and white!), the stripes, the floral pattern (climbing my left side)! :)


I sent these snapshots to my mum and she said she liked it very much!
The inspiration for this top came from this pin: I realized I could place the floral part of the fabric on one side, to create a lovely asymmetrical look.

The grey petal sleeves t-shirt

Some weeks ago I finished a more complex top: one in grey with petal sleeves and mother-of-pearls bottons.

how to make petal sleeves

how to make petal sleeves

I learned how to modify a basic t-shirt pattern to make a petal sleeve thanks to some tutorials I've pinned in my Pinterest board about "sewing clothes" (this one for example).
I've altered the pattern I've previously used for this cardigan and the work has been simple. 
But I'm not 100% satisfied about the final result, I see too much folds here and there and the t-shirt is not so good on my body shape :(

how to make petal sleeves

However, I'm going to try again, because I'm in love with petal sleeves!

The knotted blouse
There another thing I like when I make/buy tops, t-shirts or blouses: knotted necklines! I'm a bit obsessed.

So this spring (in april) I decided to make a blouse of this kind.
I have only one photo of me wearing it, because now it's too hot (july!!!) to take other images of me with a long sleeved blouse!

how to add a knotted neckline

To make the blouse I've altered this pattern (yes, again!) and self-drafted the neck band.
I think I made a good work!

Since I'm obsessed by knots, I'm going to make other blouses with this caractheristic: I'd like to test the "Mimosa blouse" pattern by SBCC: it's a .pdf pattern for a t-shirt with raglan sleeves (love it!) and a flat knot. I like it because it's sporty and feminine at the same time!
If you like knotted blouses, but you are looking for something more elegant the Lottie blouse (free pattern!) is for you!

Some notes
If you have suggestions about handmade spring/summer tops (or want to share with me the tops you've made), please, leave a comment!
If you're looking for some inspirations, you can take a glance into my Pinterest board about sewing clothes.
Speaking about my future projects... I'd like to go on with asymmetry making something like this or this. But also the Harper blouse (free pattern!) by Spit Up & Stilettos is a good choice for my body shape (I'm a curvy hourglass).

Hope I've inspired you to make some summer tops for you! :)
Related Posts Plugin for WordPress, Blogger...